• In the Box

    ✅ Beacon - Fully assembled with latest firmware installed and configured

    ✅ LoRa Antenna w/cable - (Varies based on antenna purchased)

    ✅ Bluetooth Antenna w/cable (Optional) - Provided if external antenna was selected. Otherwise, internal BLE antenna will be installed.

    ✅ Hardware (Optional) - For mounting the Beacon, or antennas

    ✅ USB Cable - Use this for USB charging and firmware updates

    ✅ Allen Wrench - For opening enclosure

  • Install Antenna

    Before you power on the Beacon, make sure you install the antenna cable and antenna. If the radio attempts to transmit without an antenna attached, it can burn out the radio module.

    ⚡NOTE: To charge the Beacon's battery, the battery disconnect switch must be in the ON position.

    ⚡NOTE: There is no disconnect switch for the solar panel. Sunlight on the panel will send power directly to the WisBlock.

  • Download Meshtastic App

    The free Meshtastic app enables you to connect your cell phone to the Beacon for initial configuration.

    🔗ANDROID: Play Store

    🔗iOS: Apple Store

Opening the Box

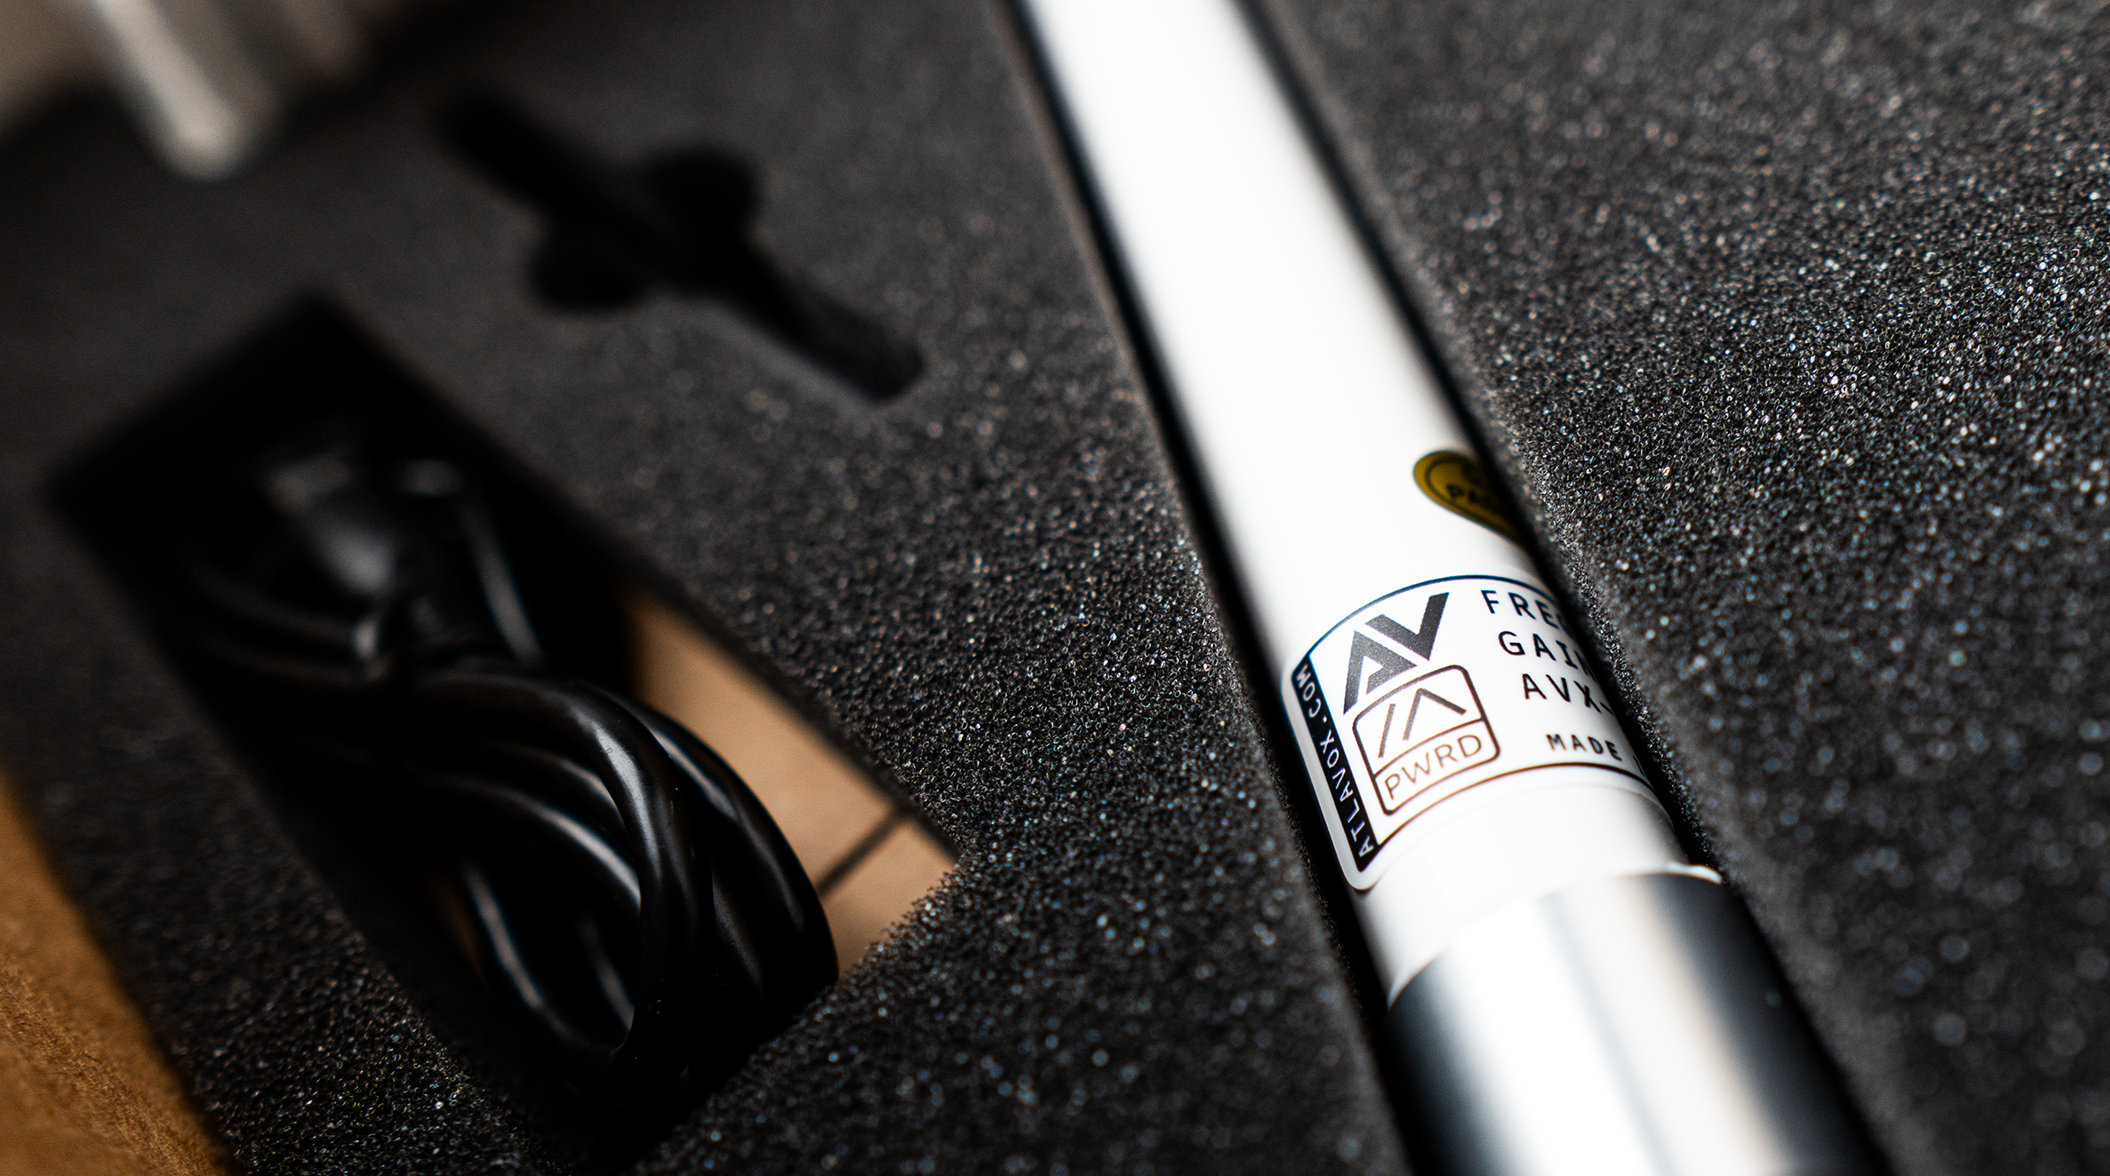
Inside the box, you'll find the Beacon underneath a top layer of protective foam. Remove the Beacon from the packaging to find your accessories below.
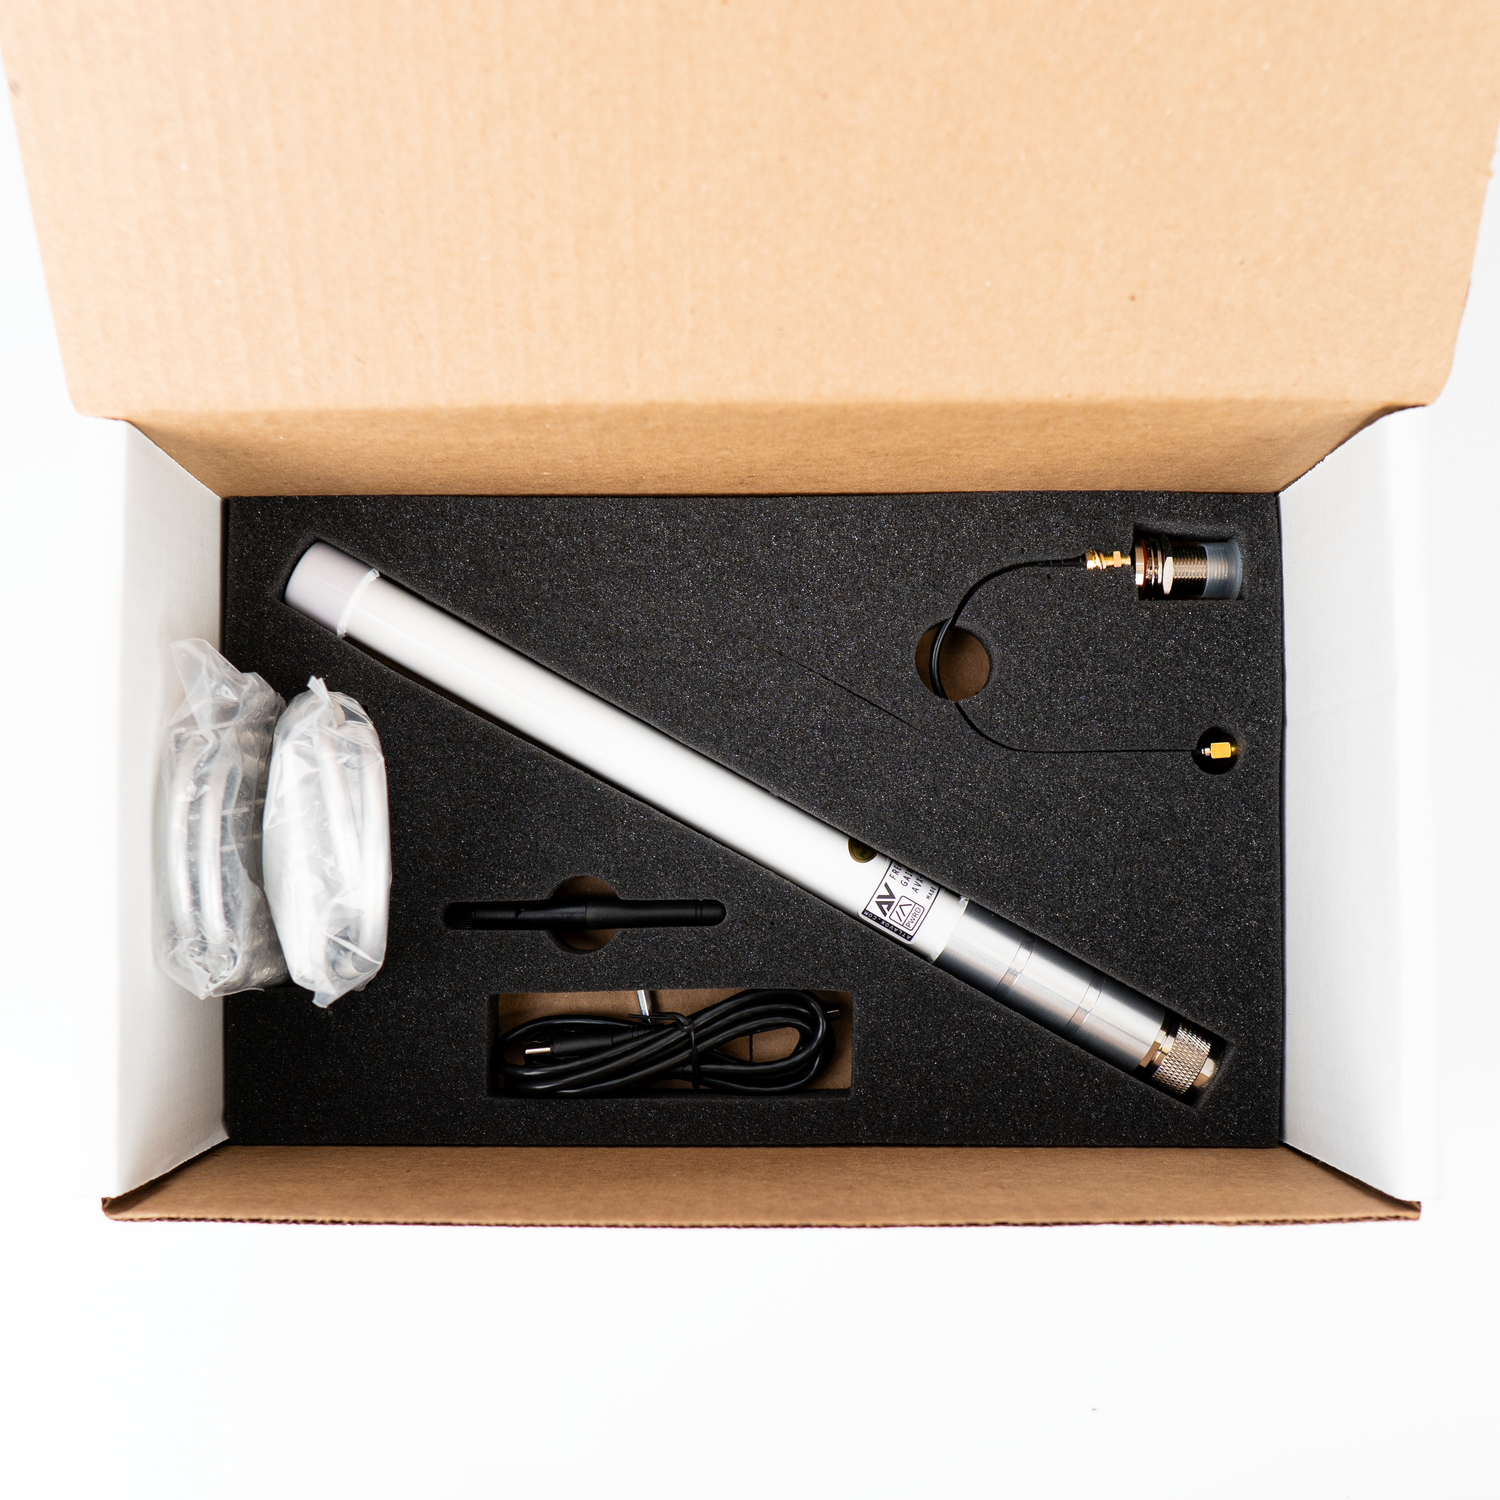
Accessories

Underneath the Beacon, you'll find the various accessories you purchased. Each Beacon is custom, so options will vary.
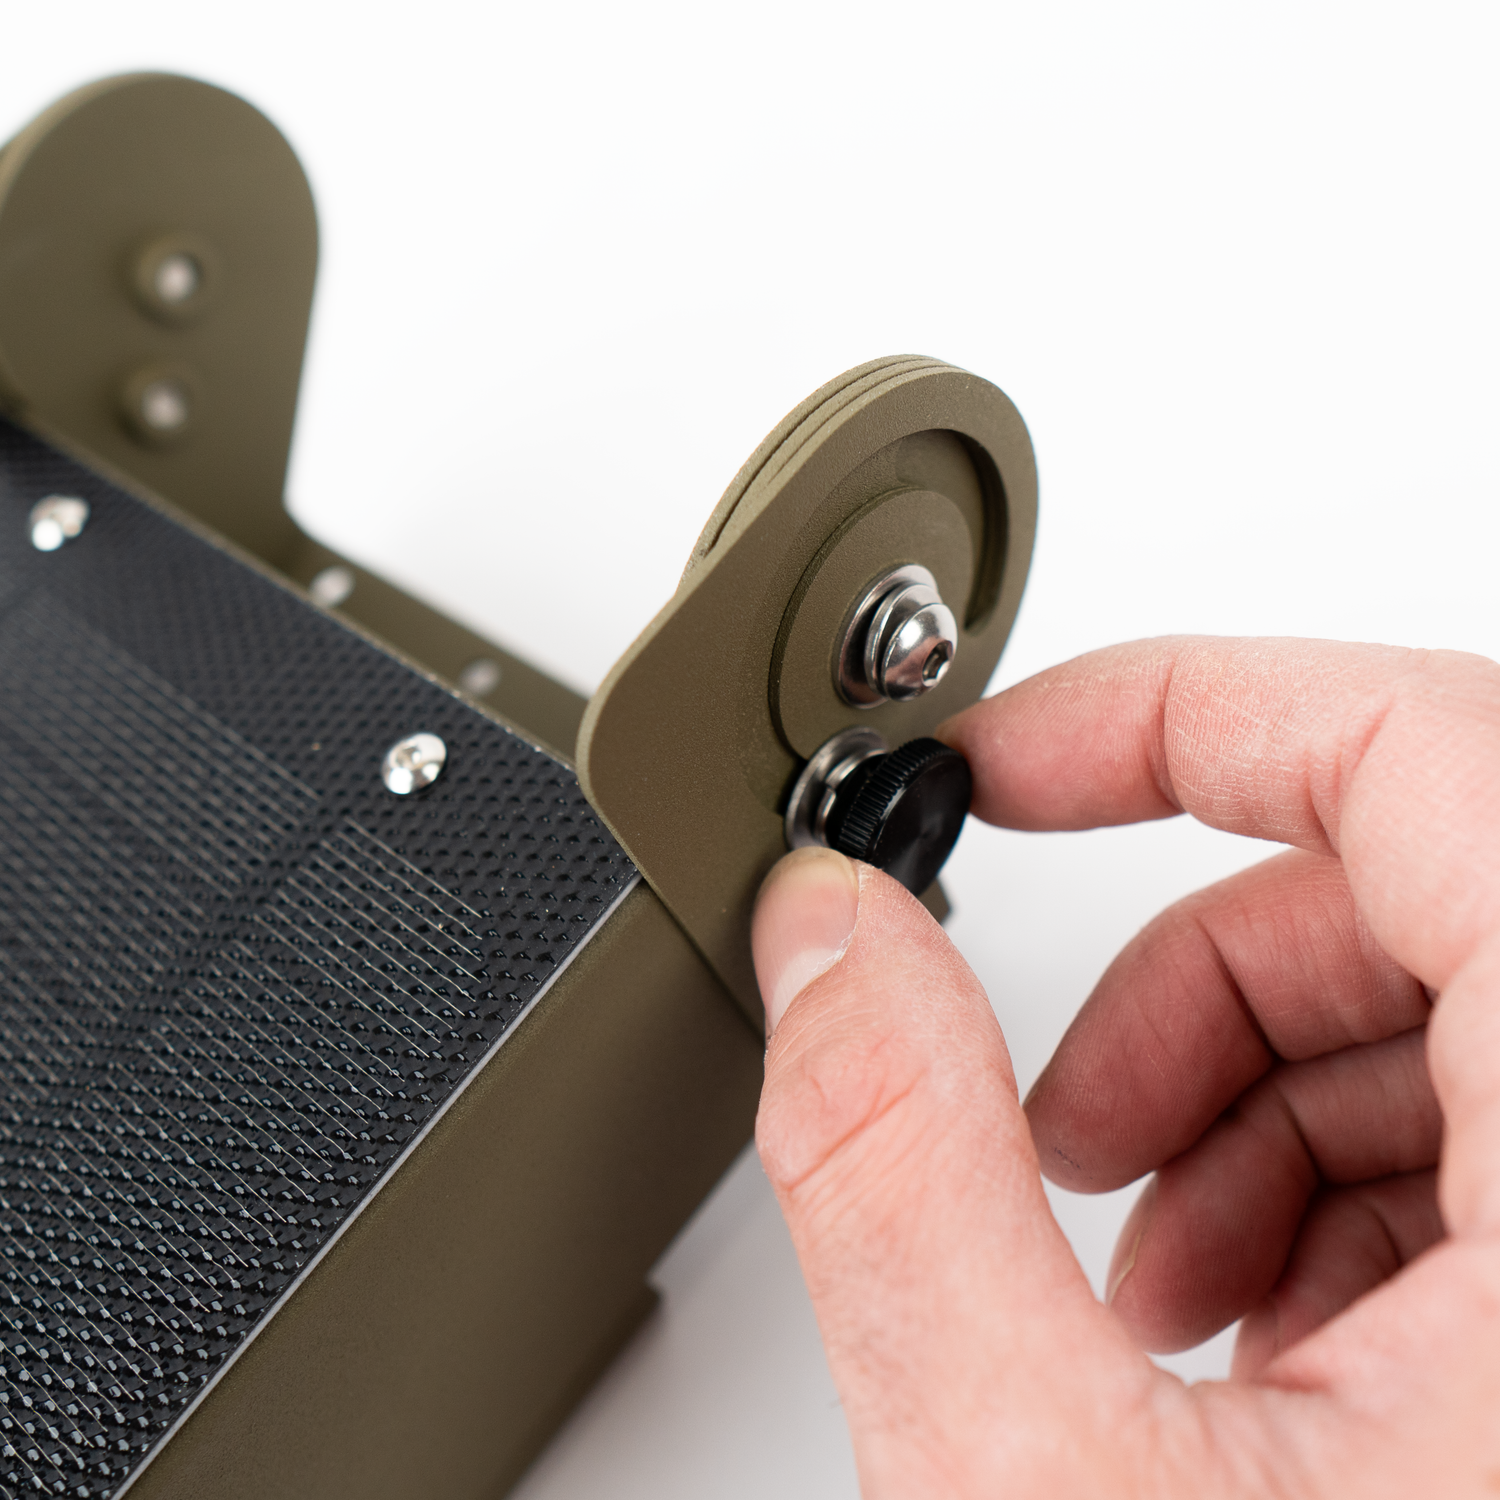
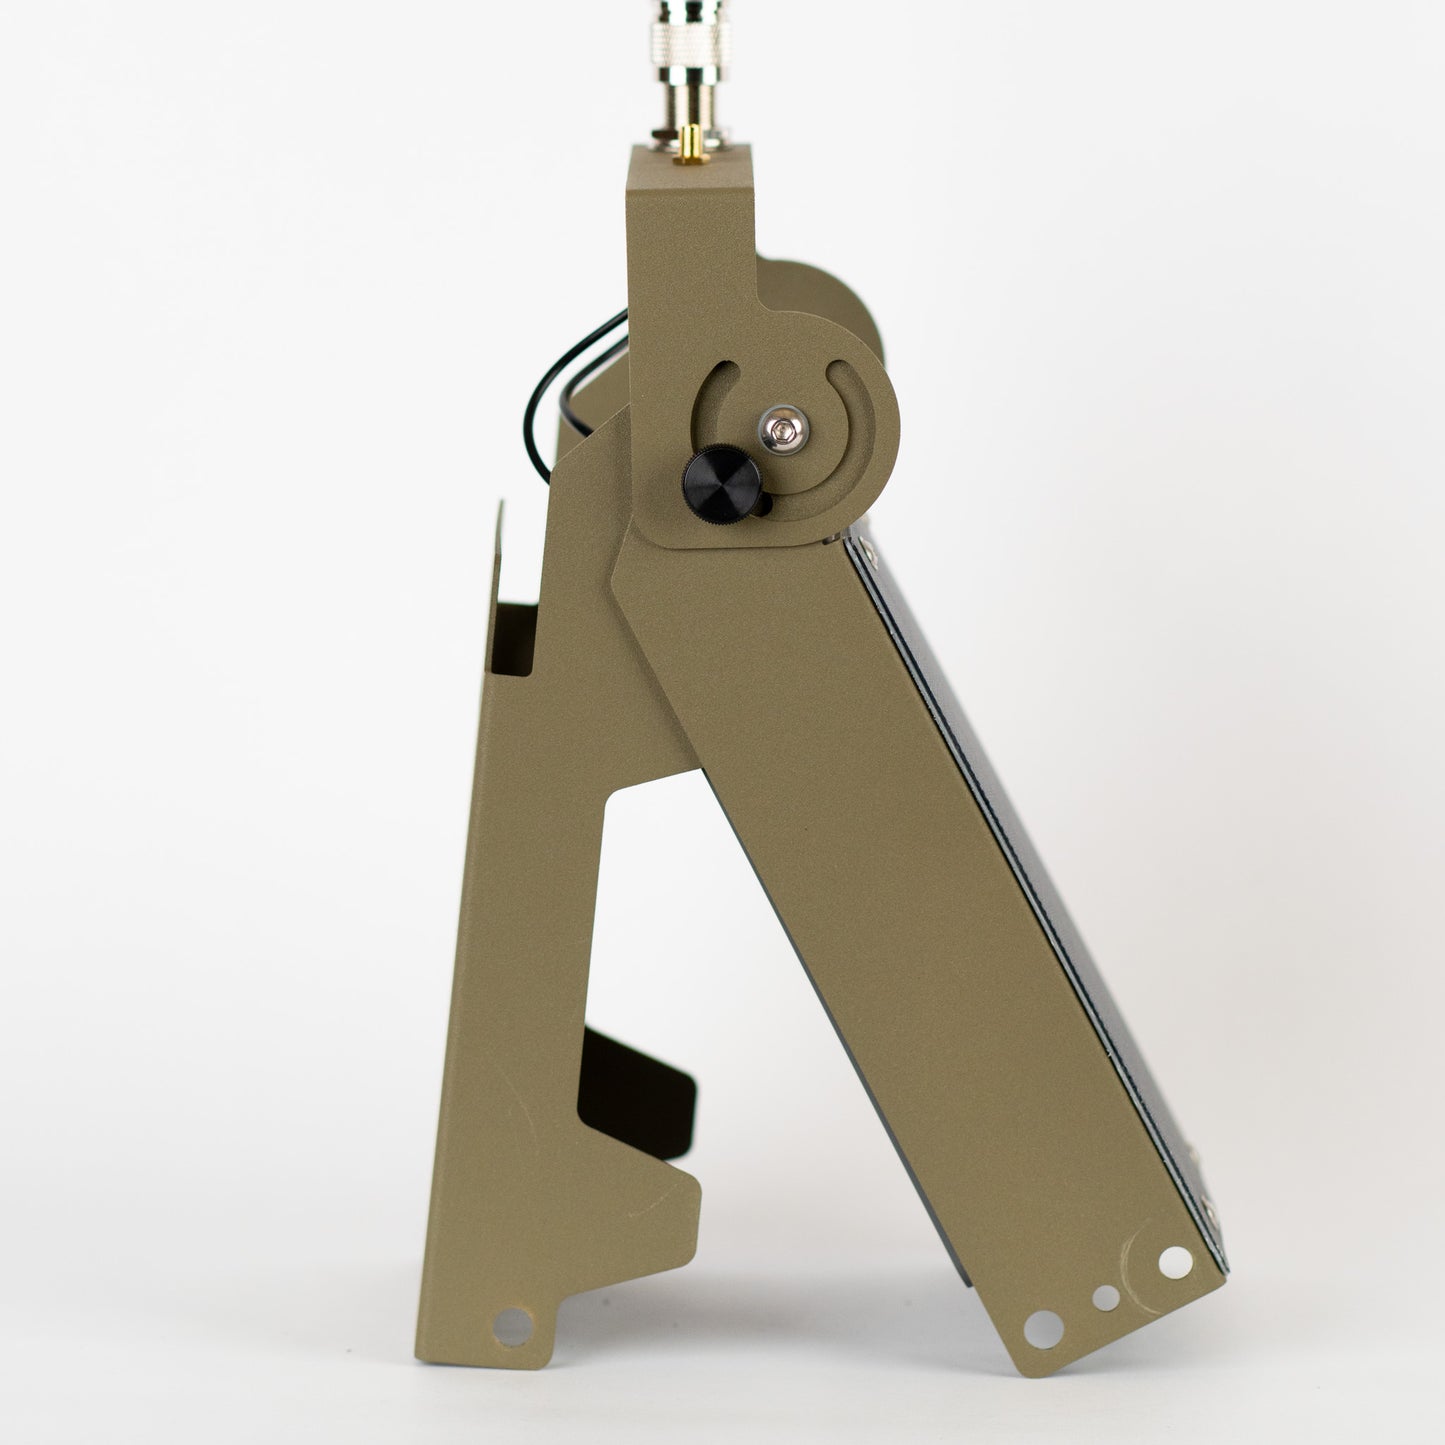
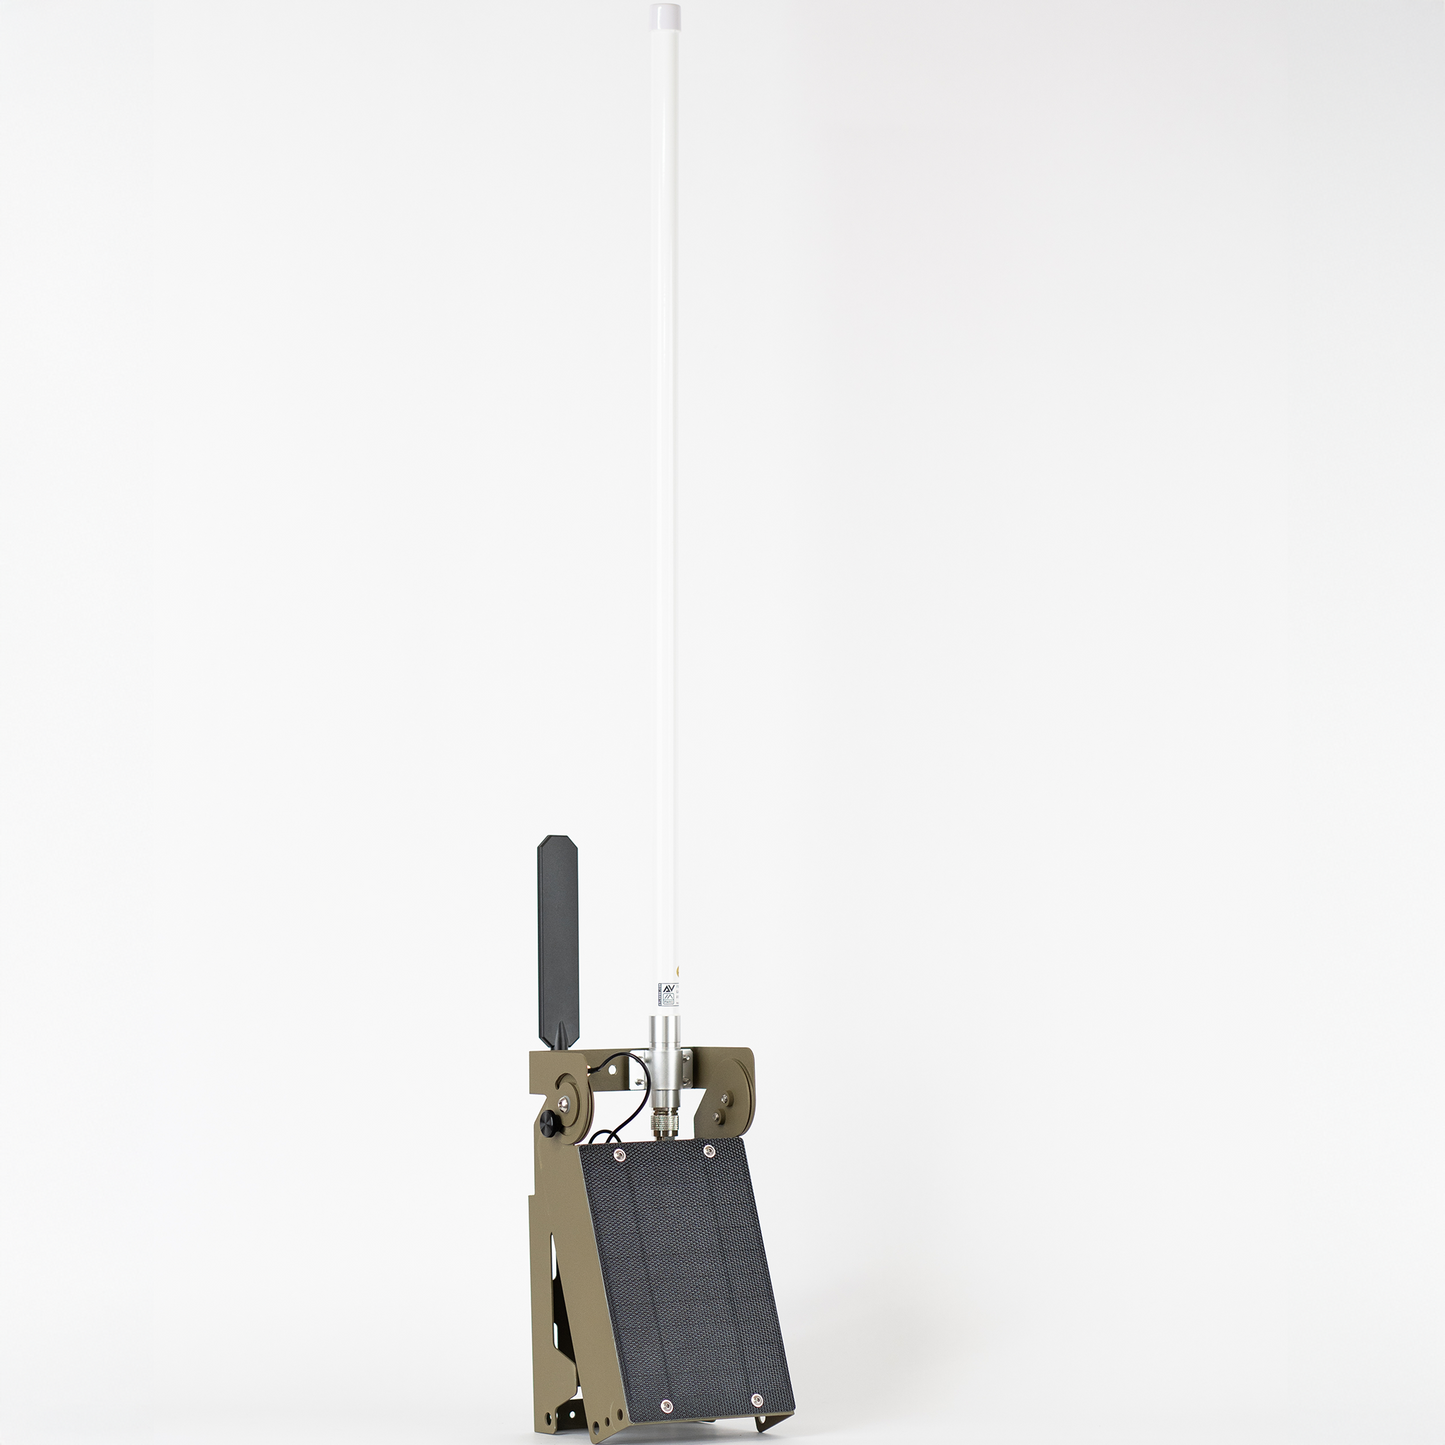
Adjust Beacon

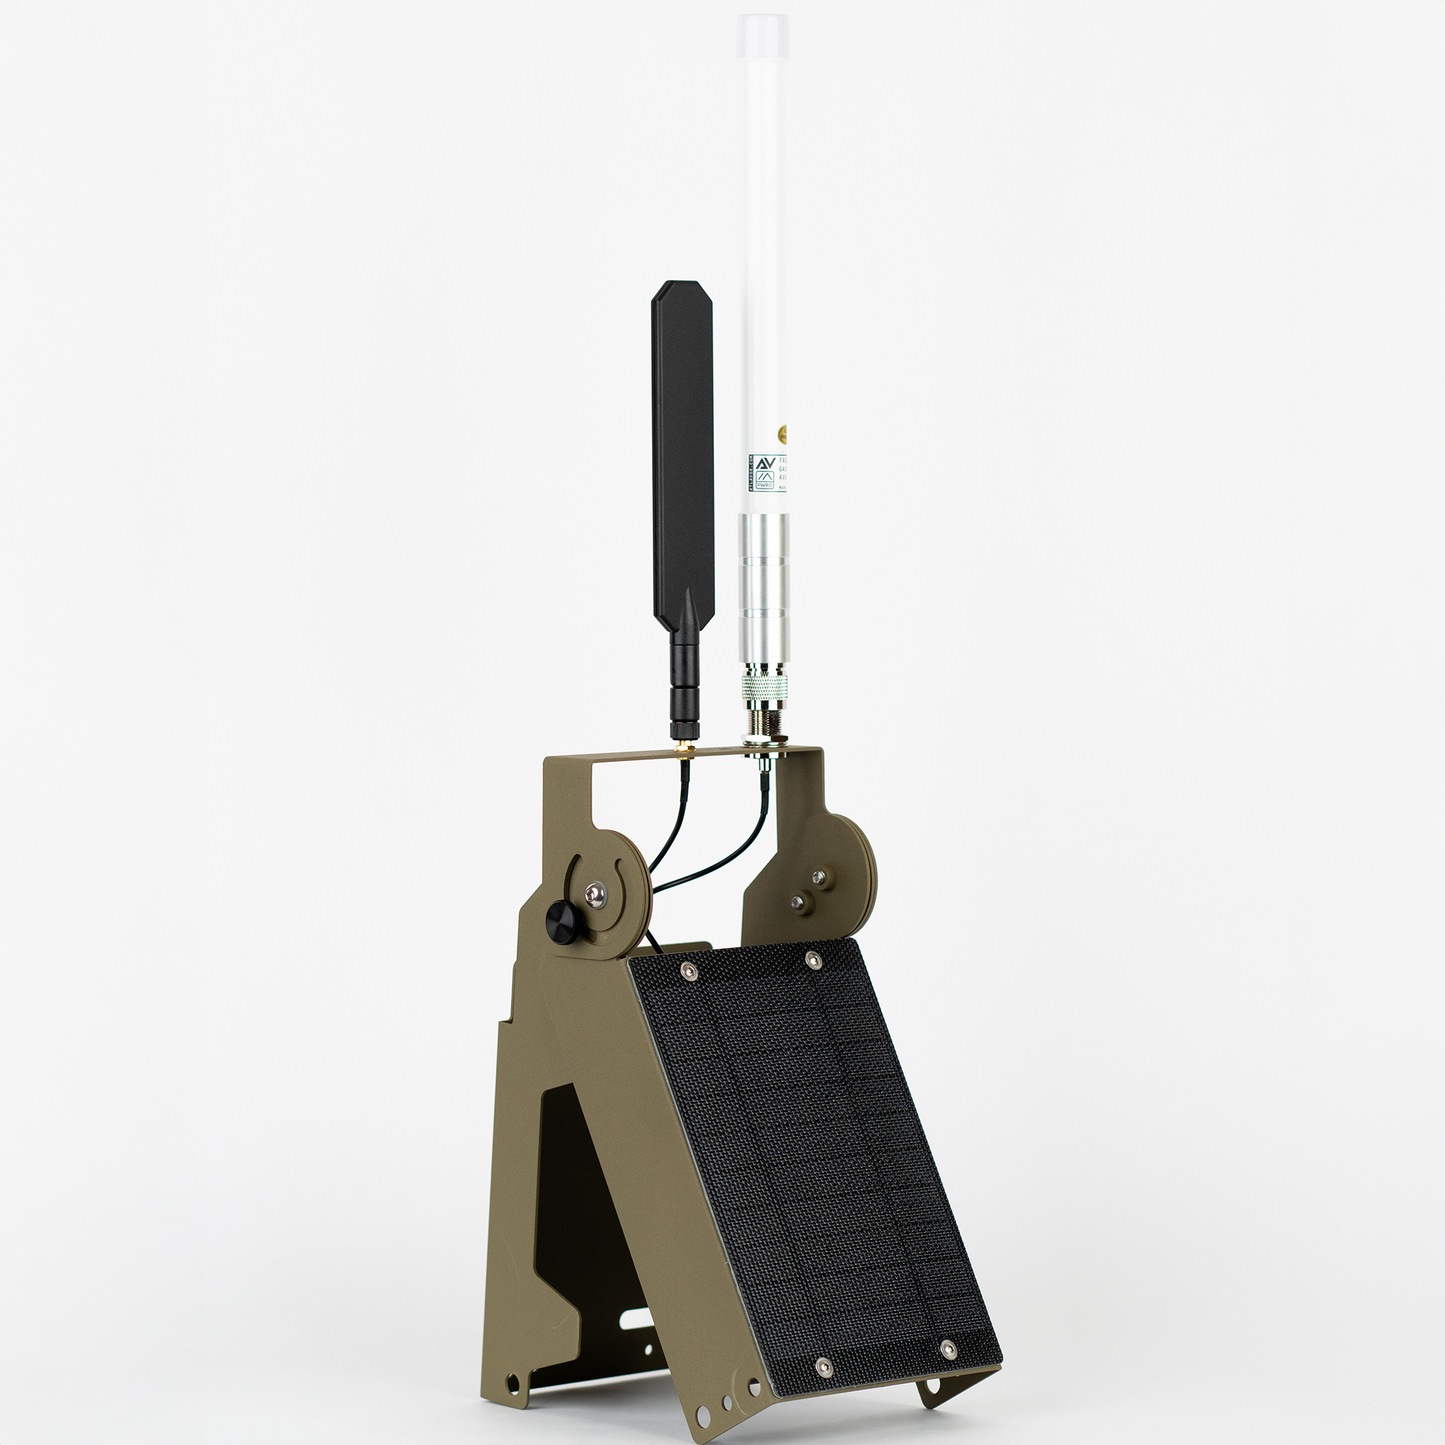
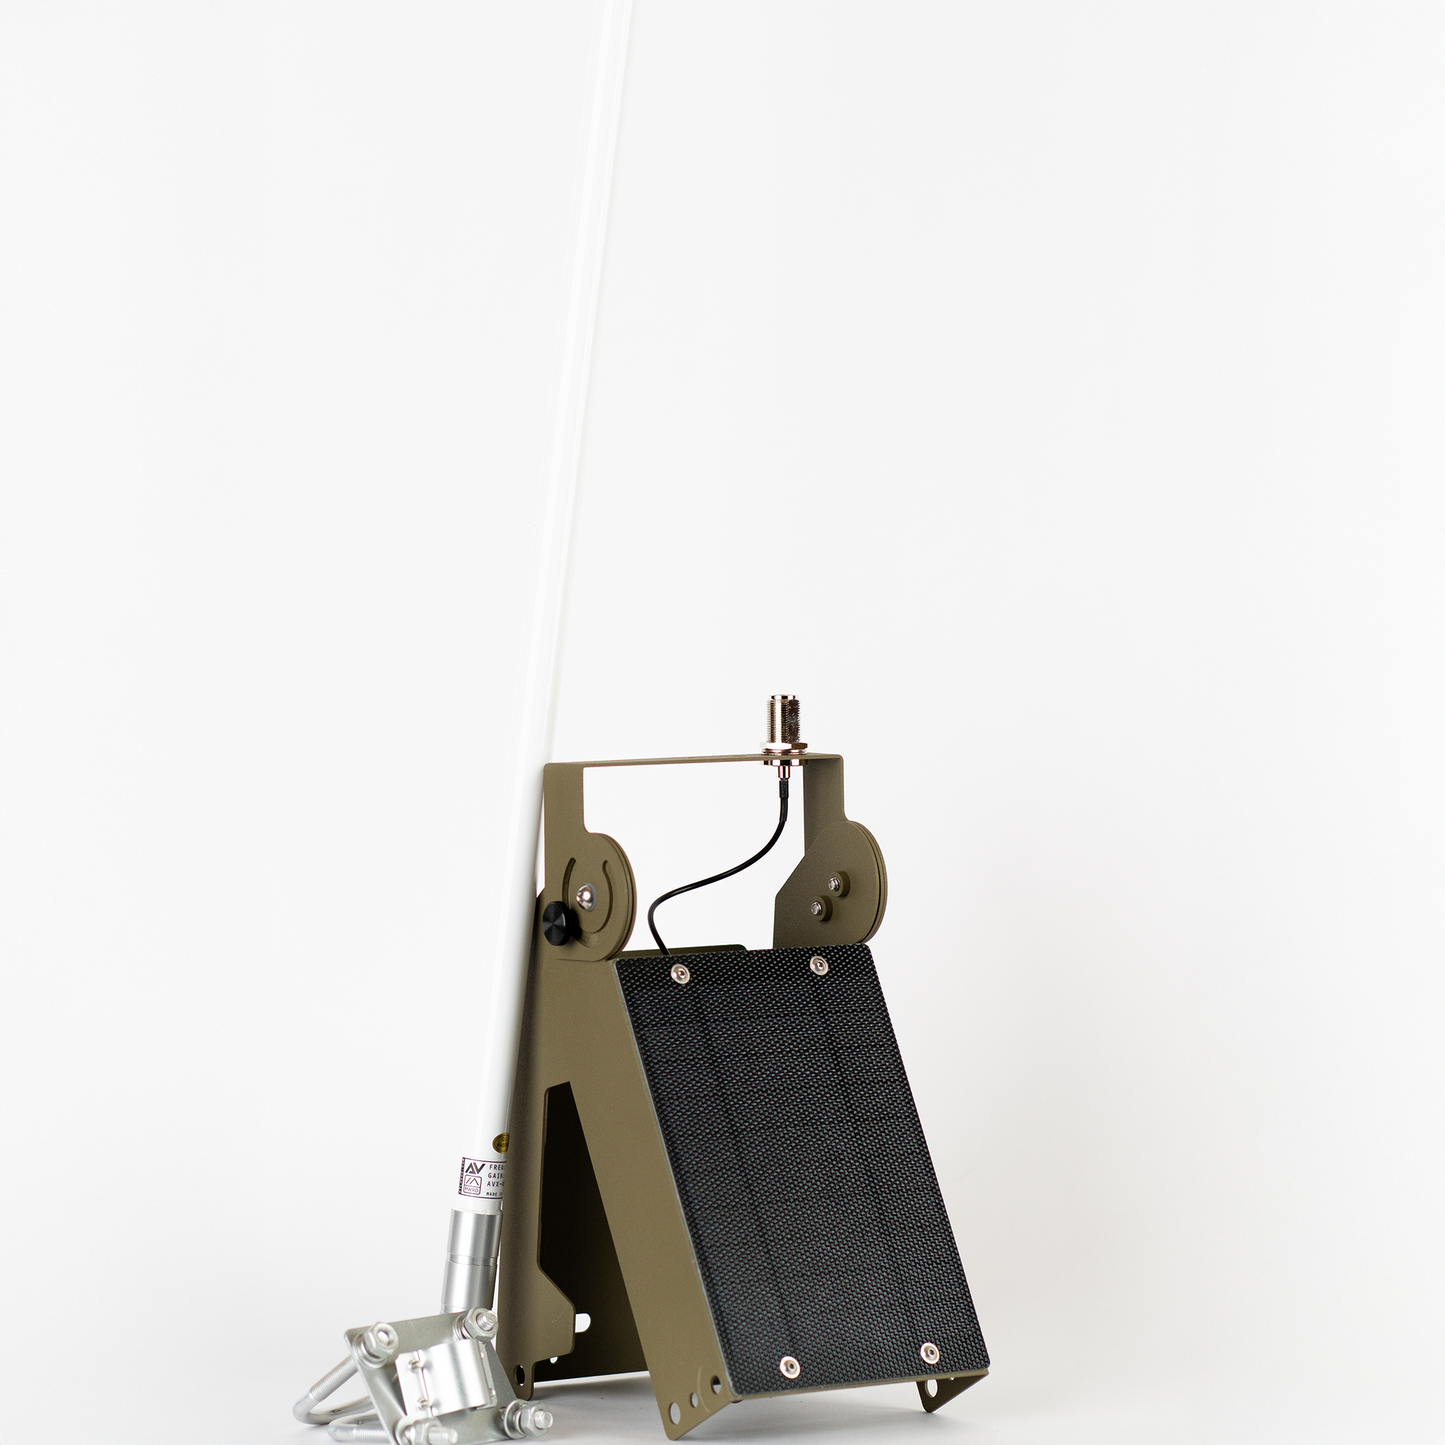
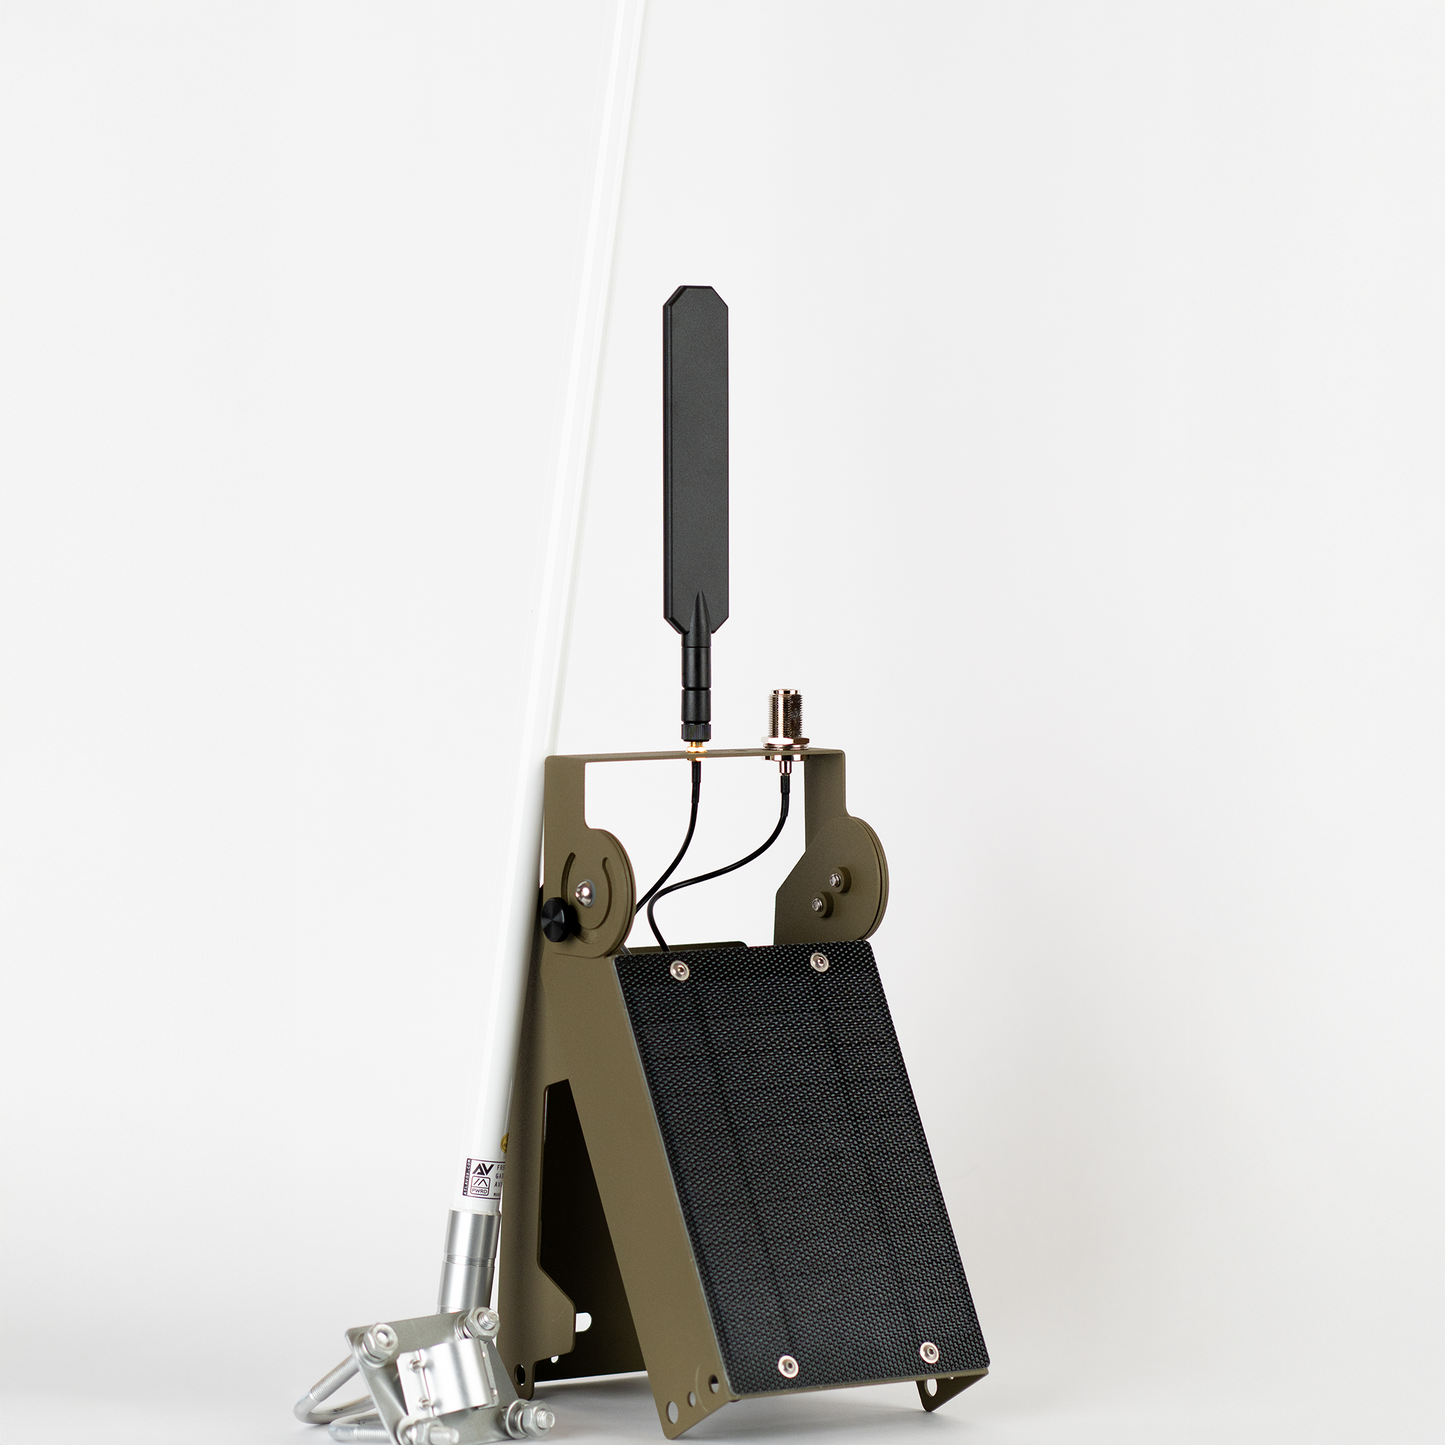
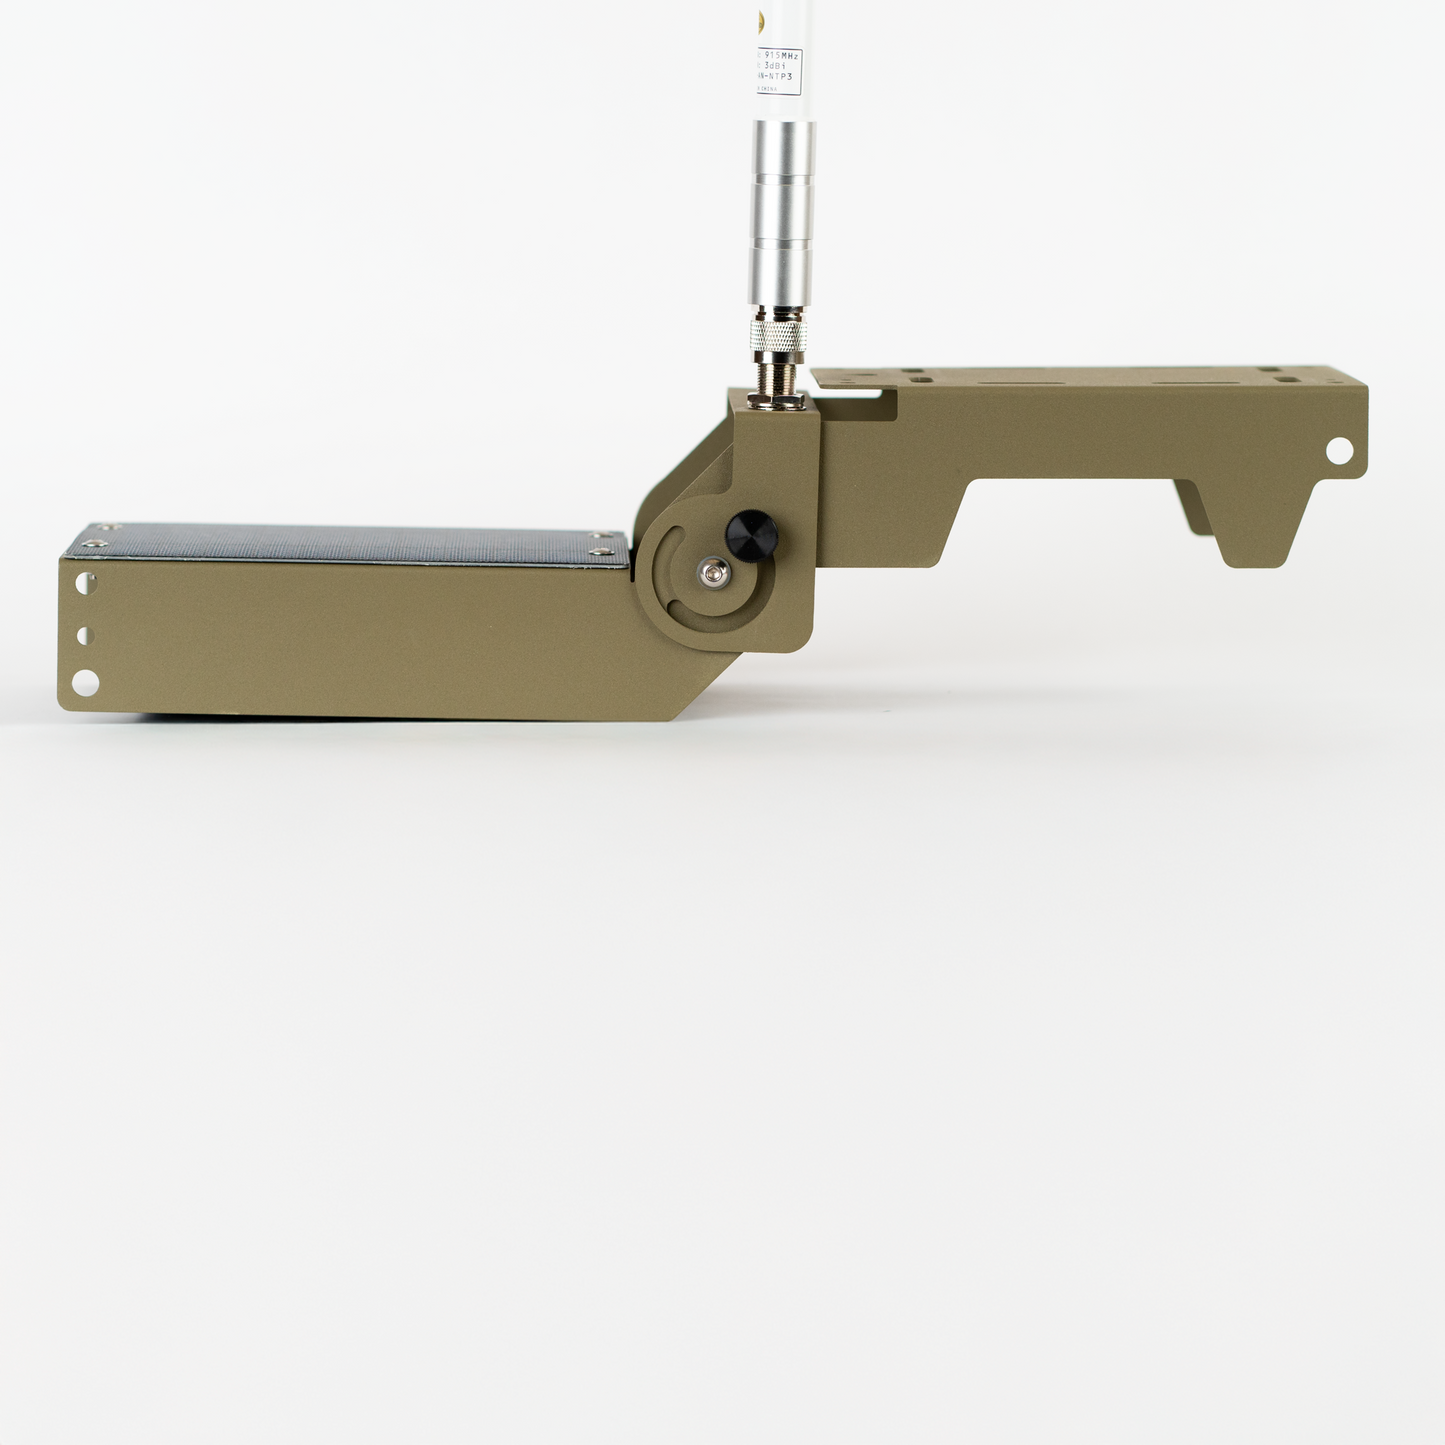
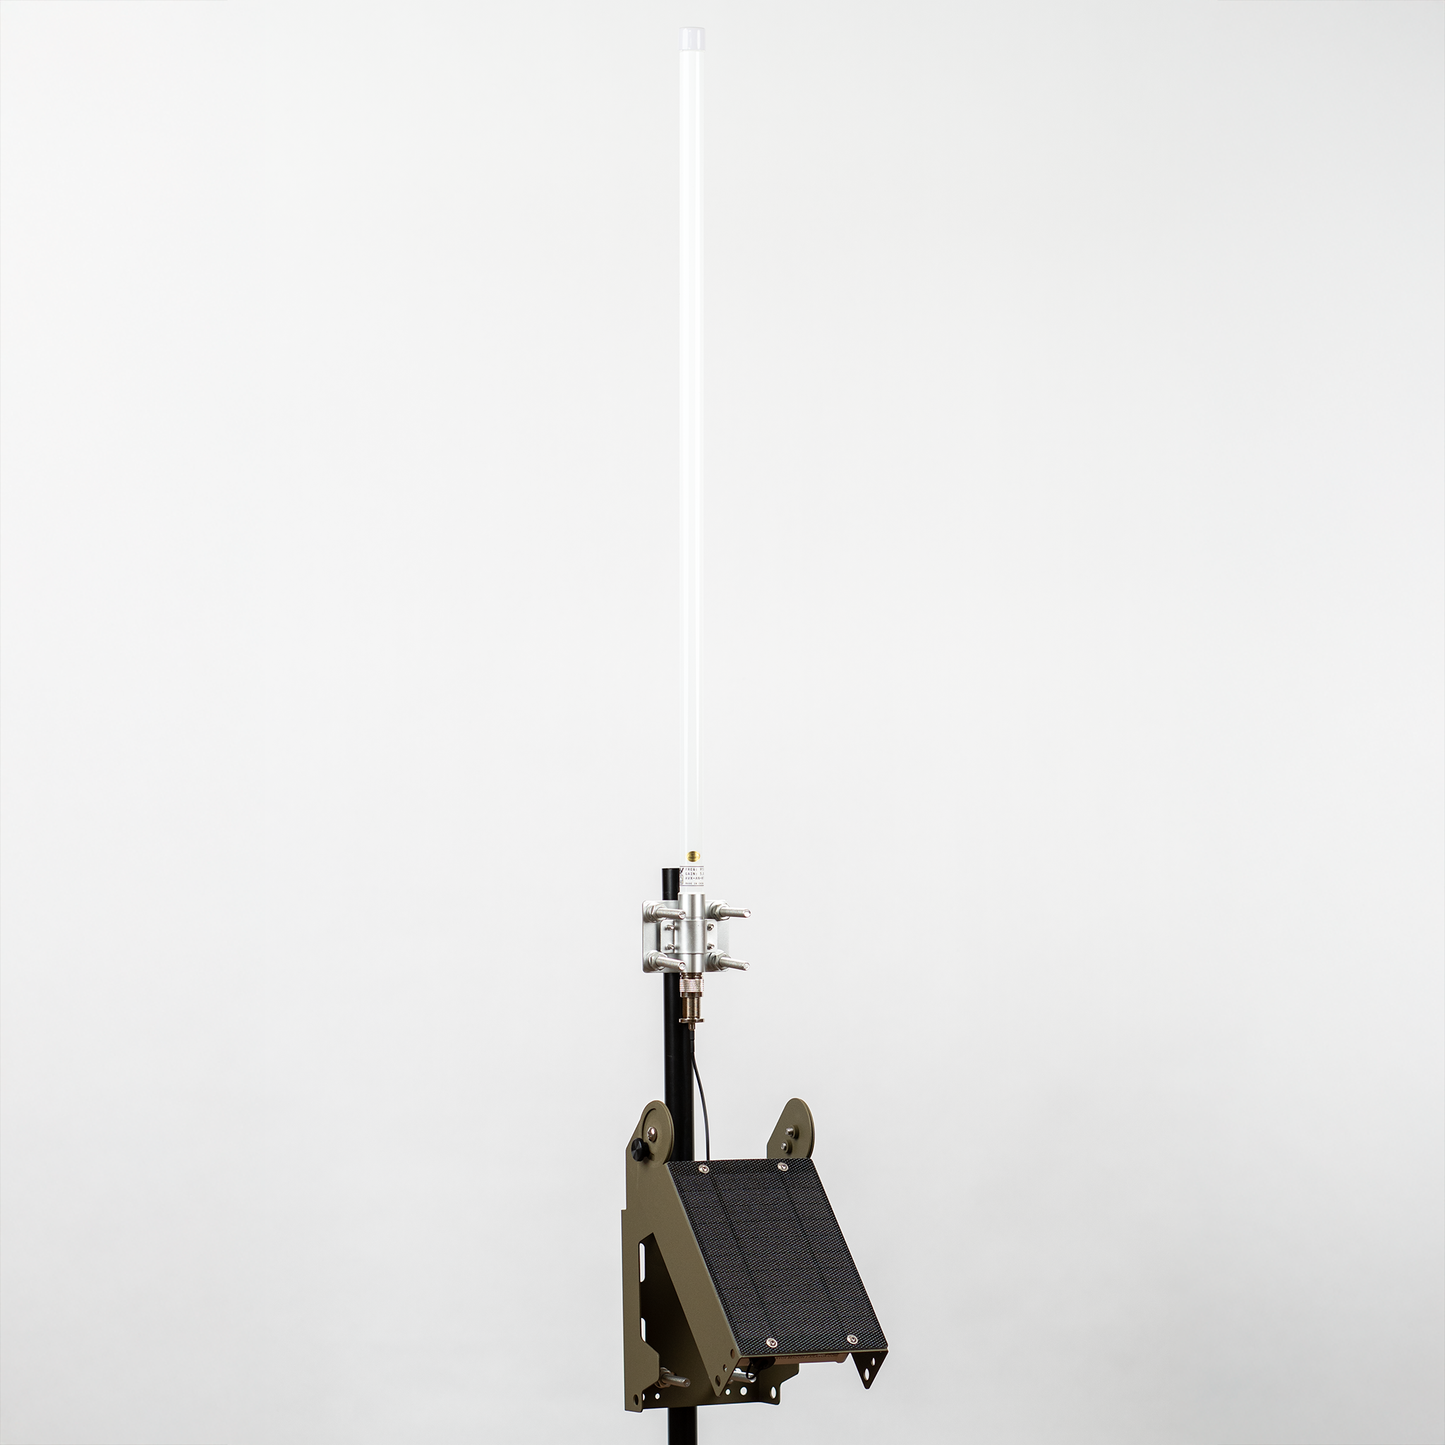
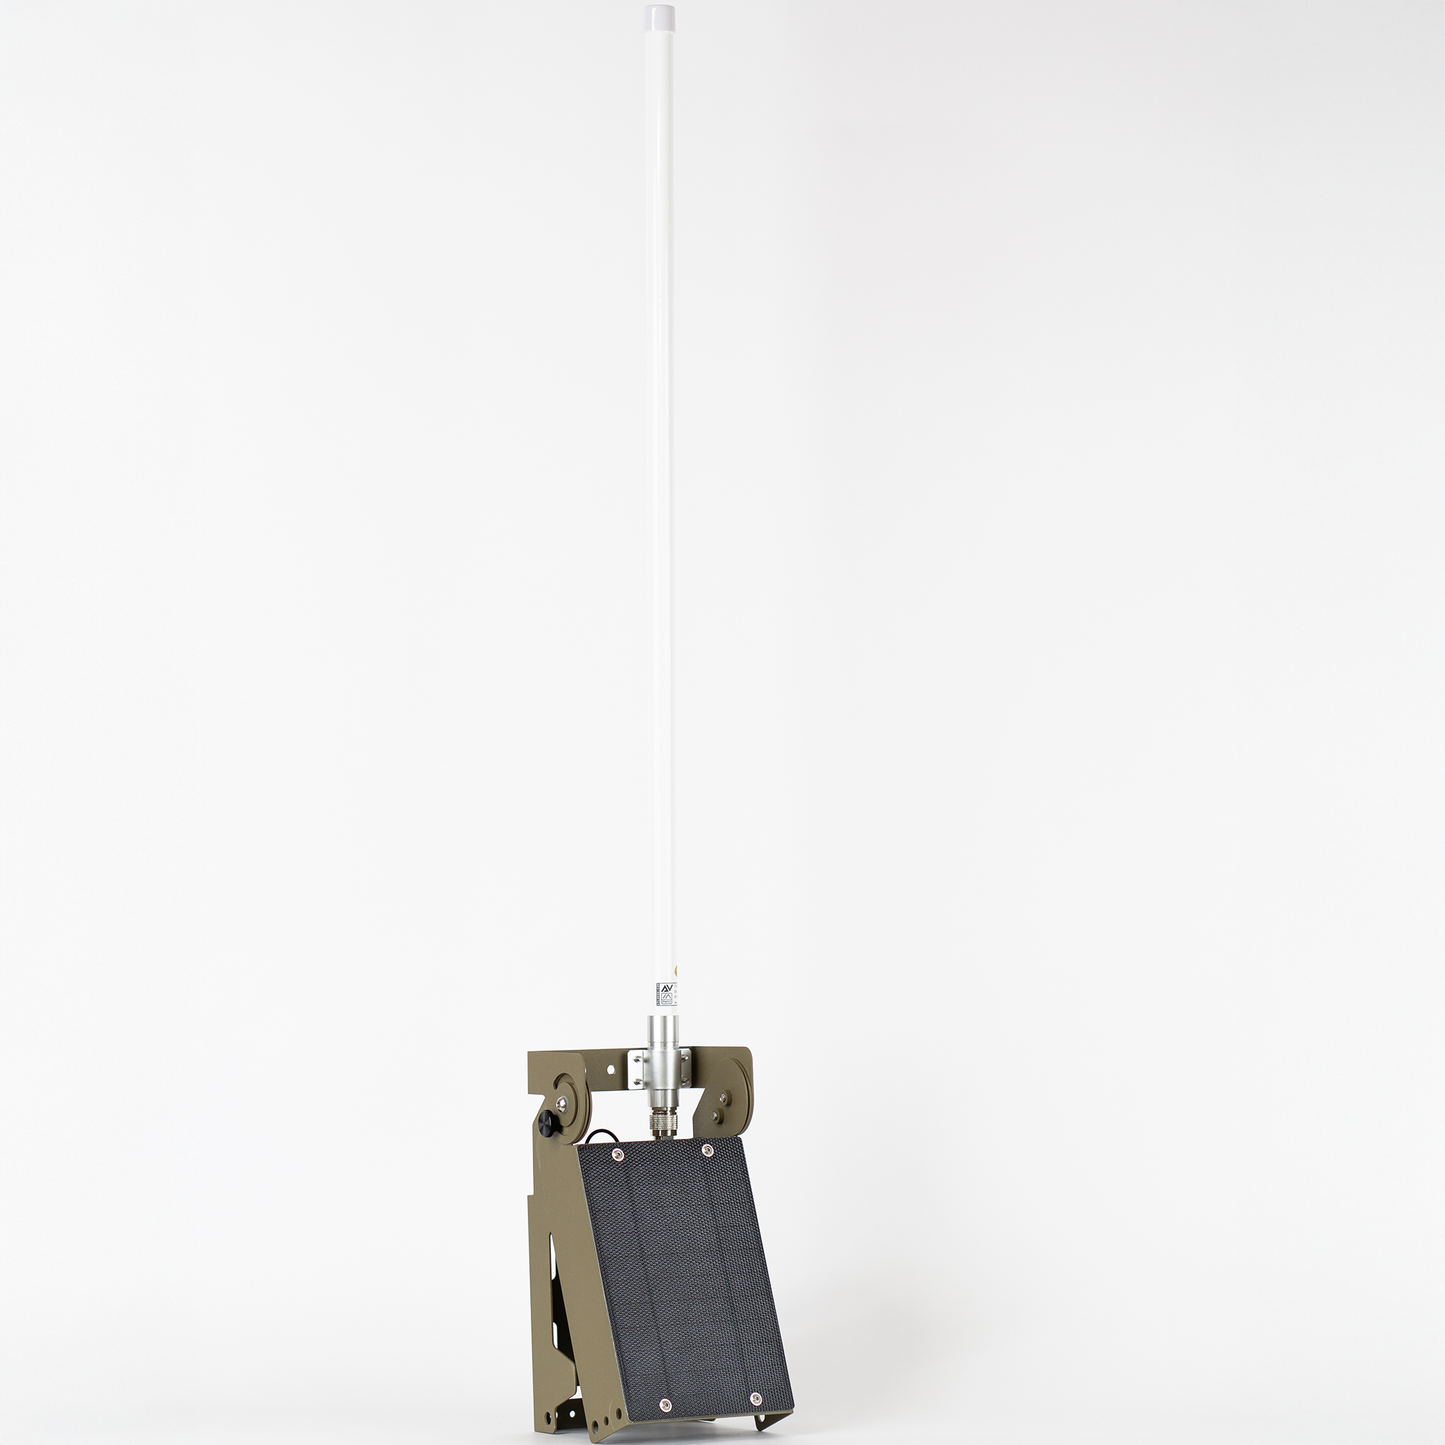
Loosen the thumbscrews and pivot bolts on both sides of the hinge, and rotate the antenna rail and mounting plate to a comfortable position while you install the antenna(s). A 4mm Allen wrench is included.
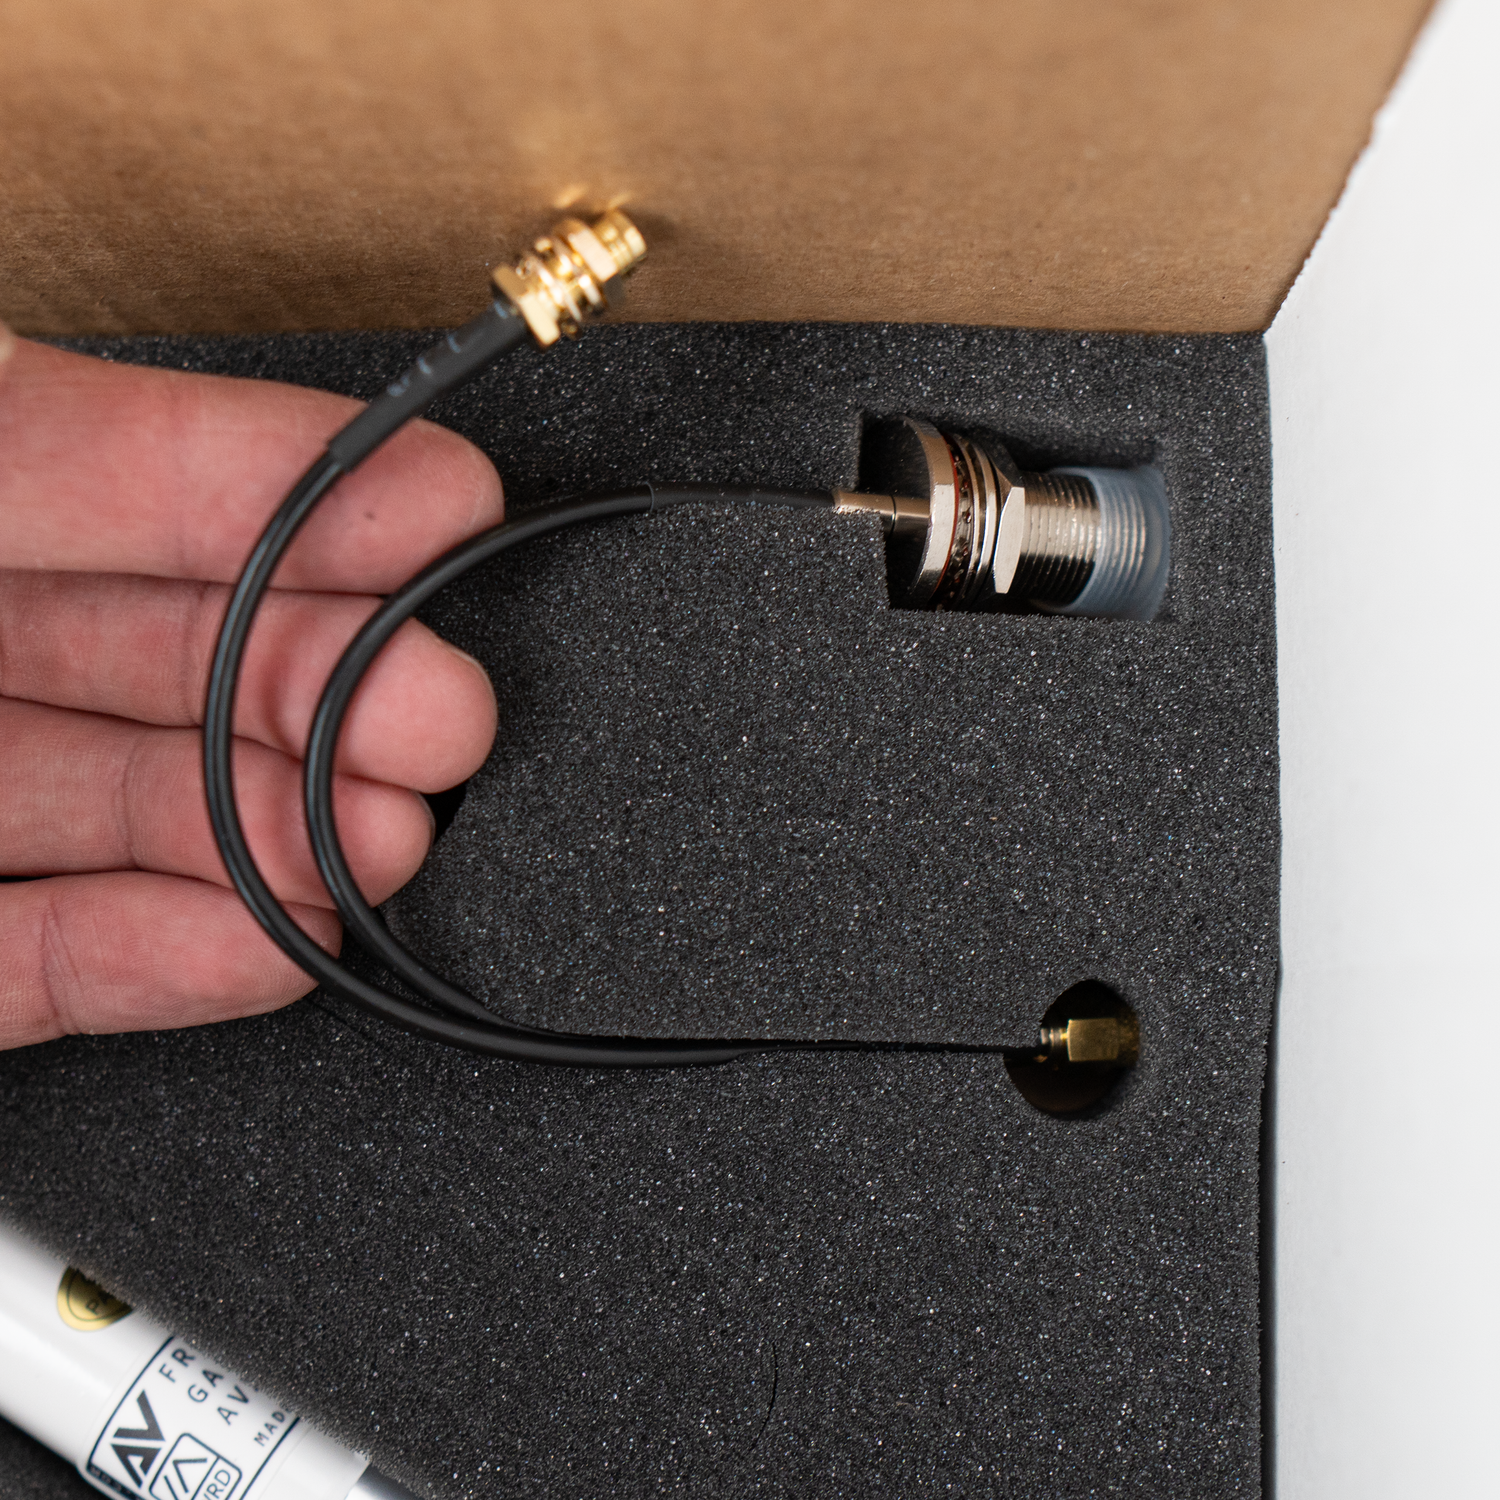
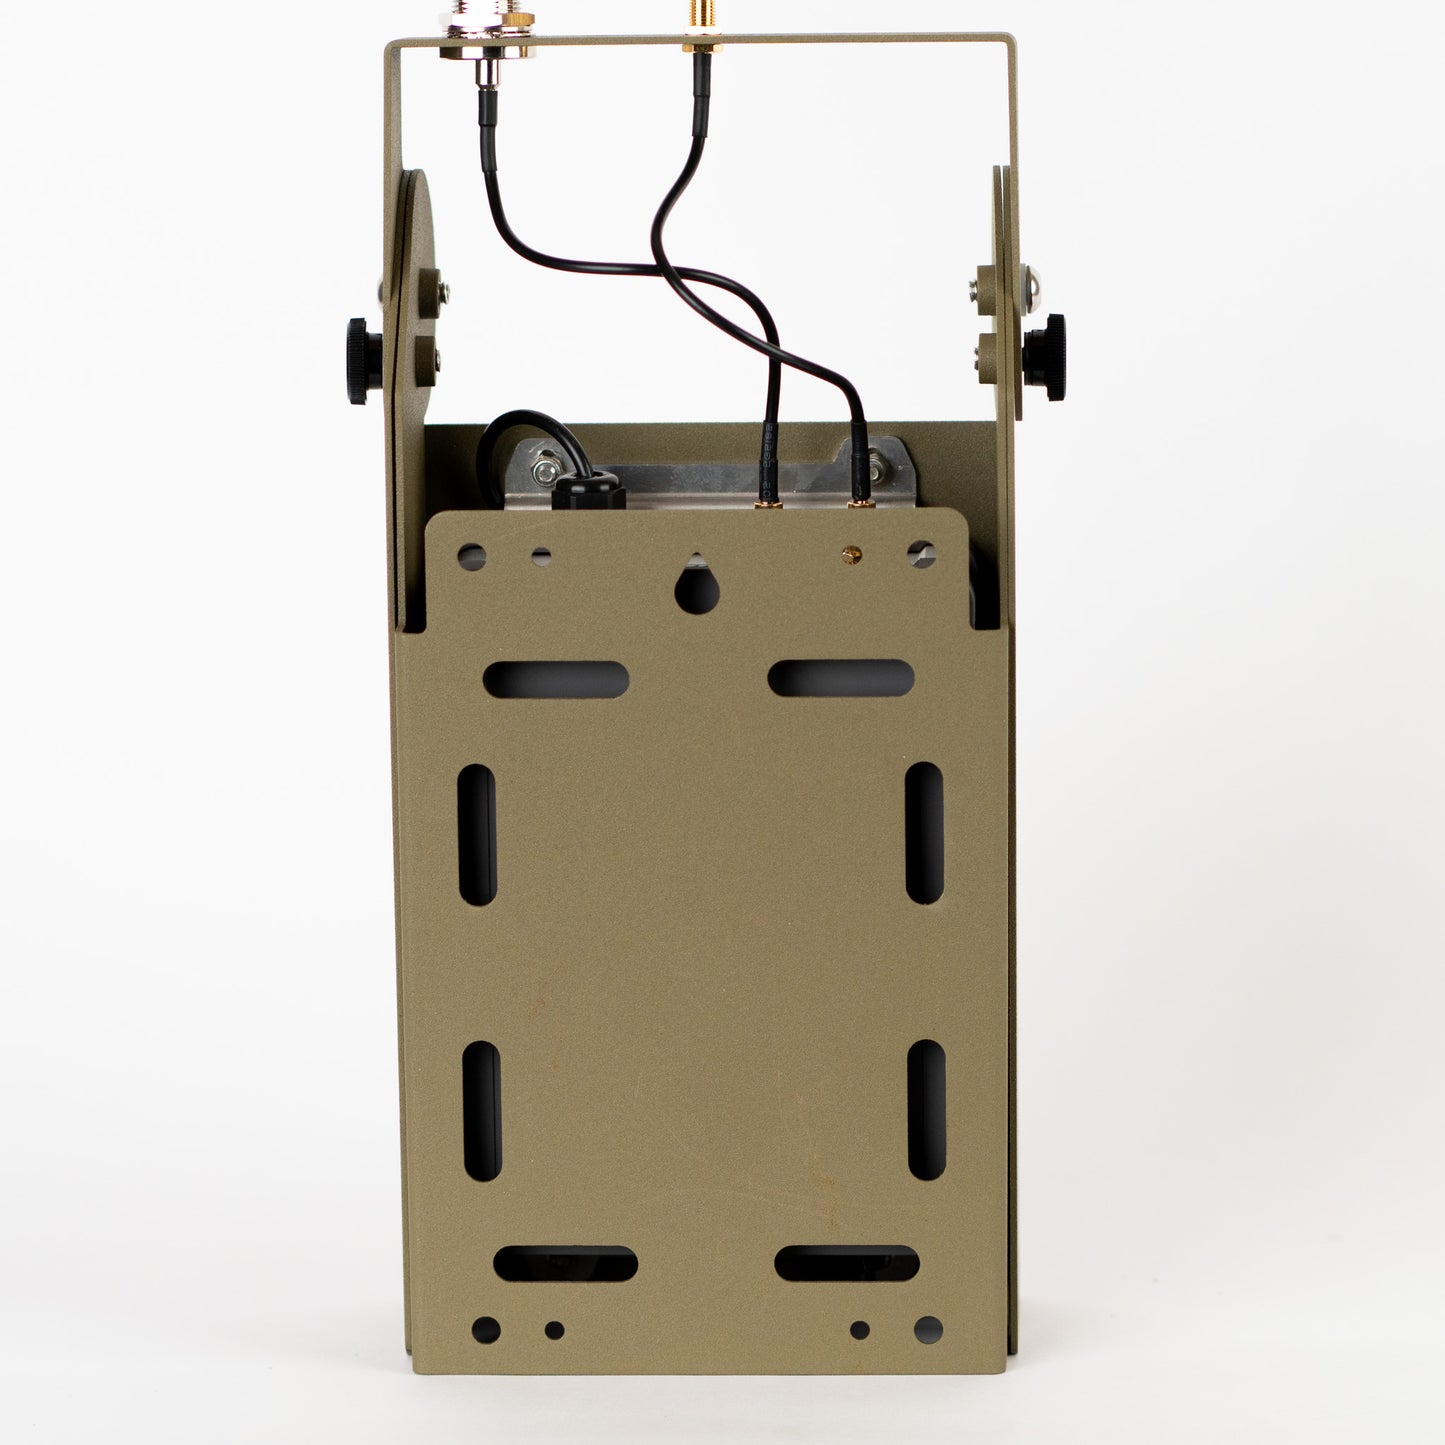
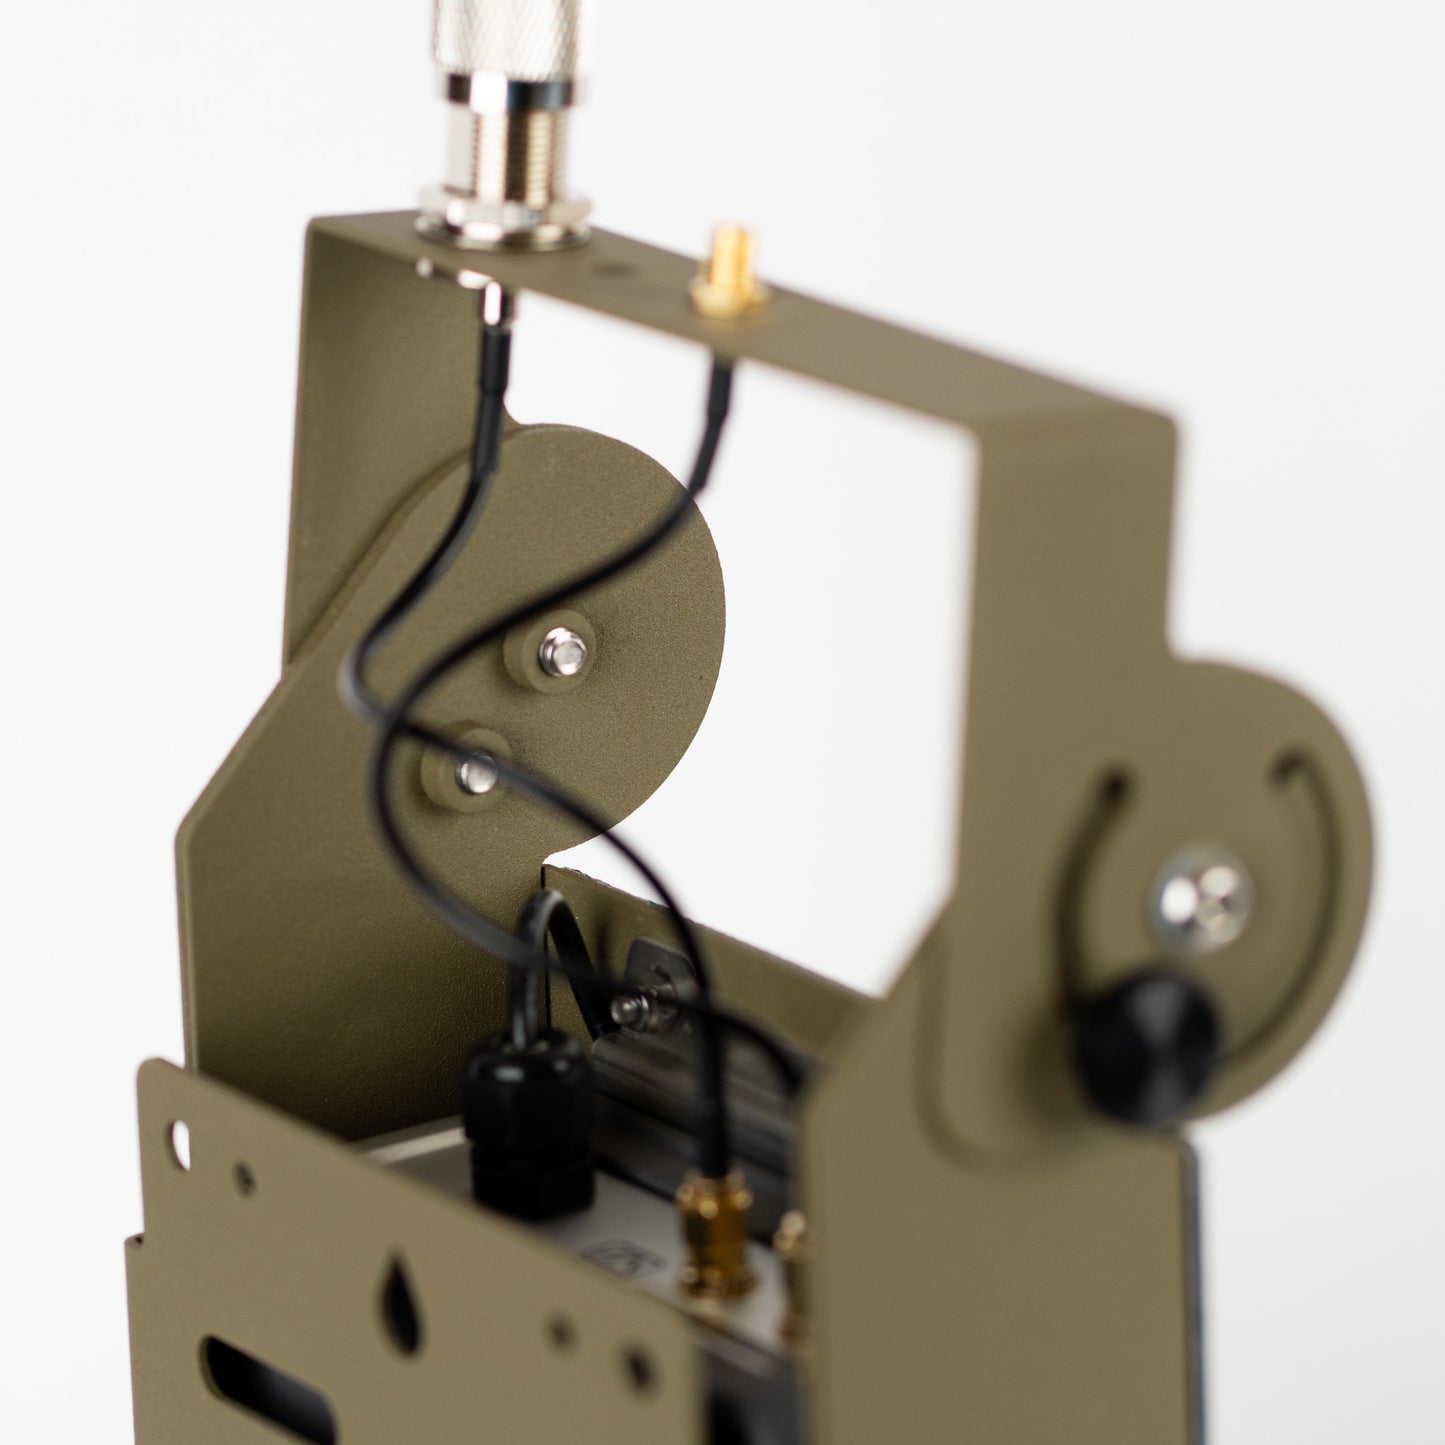
Antenna Cables

If you purchased antenna cables with your Beacon, you'll find them in the bottom of the box. The cables allow you to mount an antenna to the antenna rail so your antennas can be oriented independently from the mounting plate and solar panel.
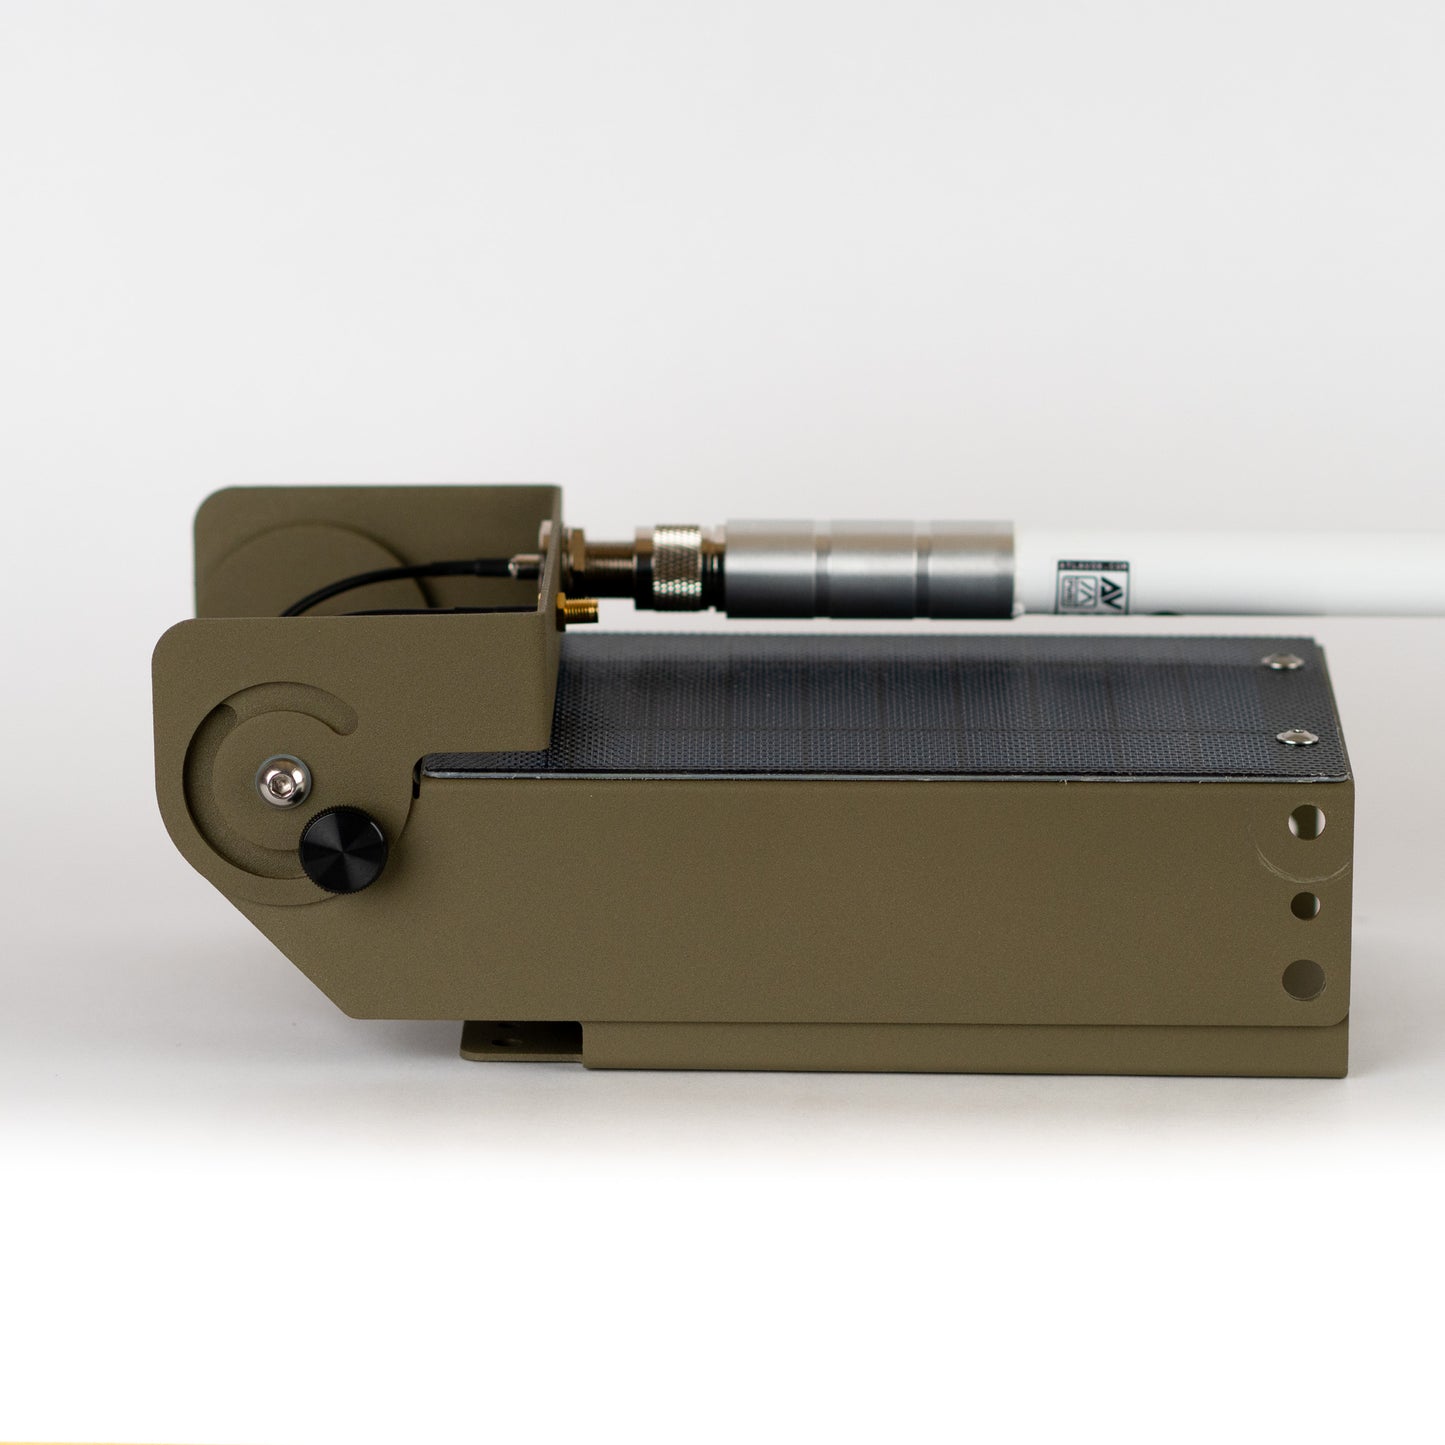
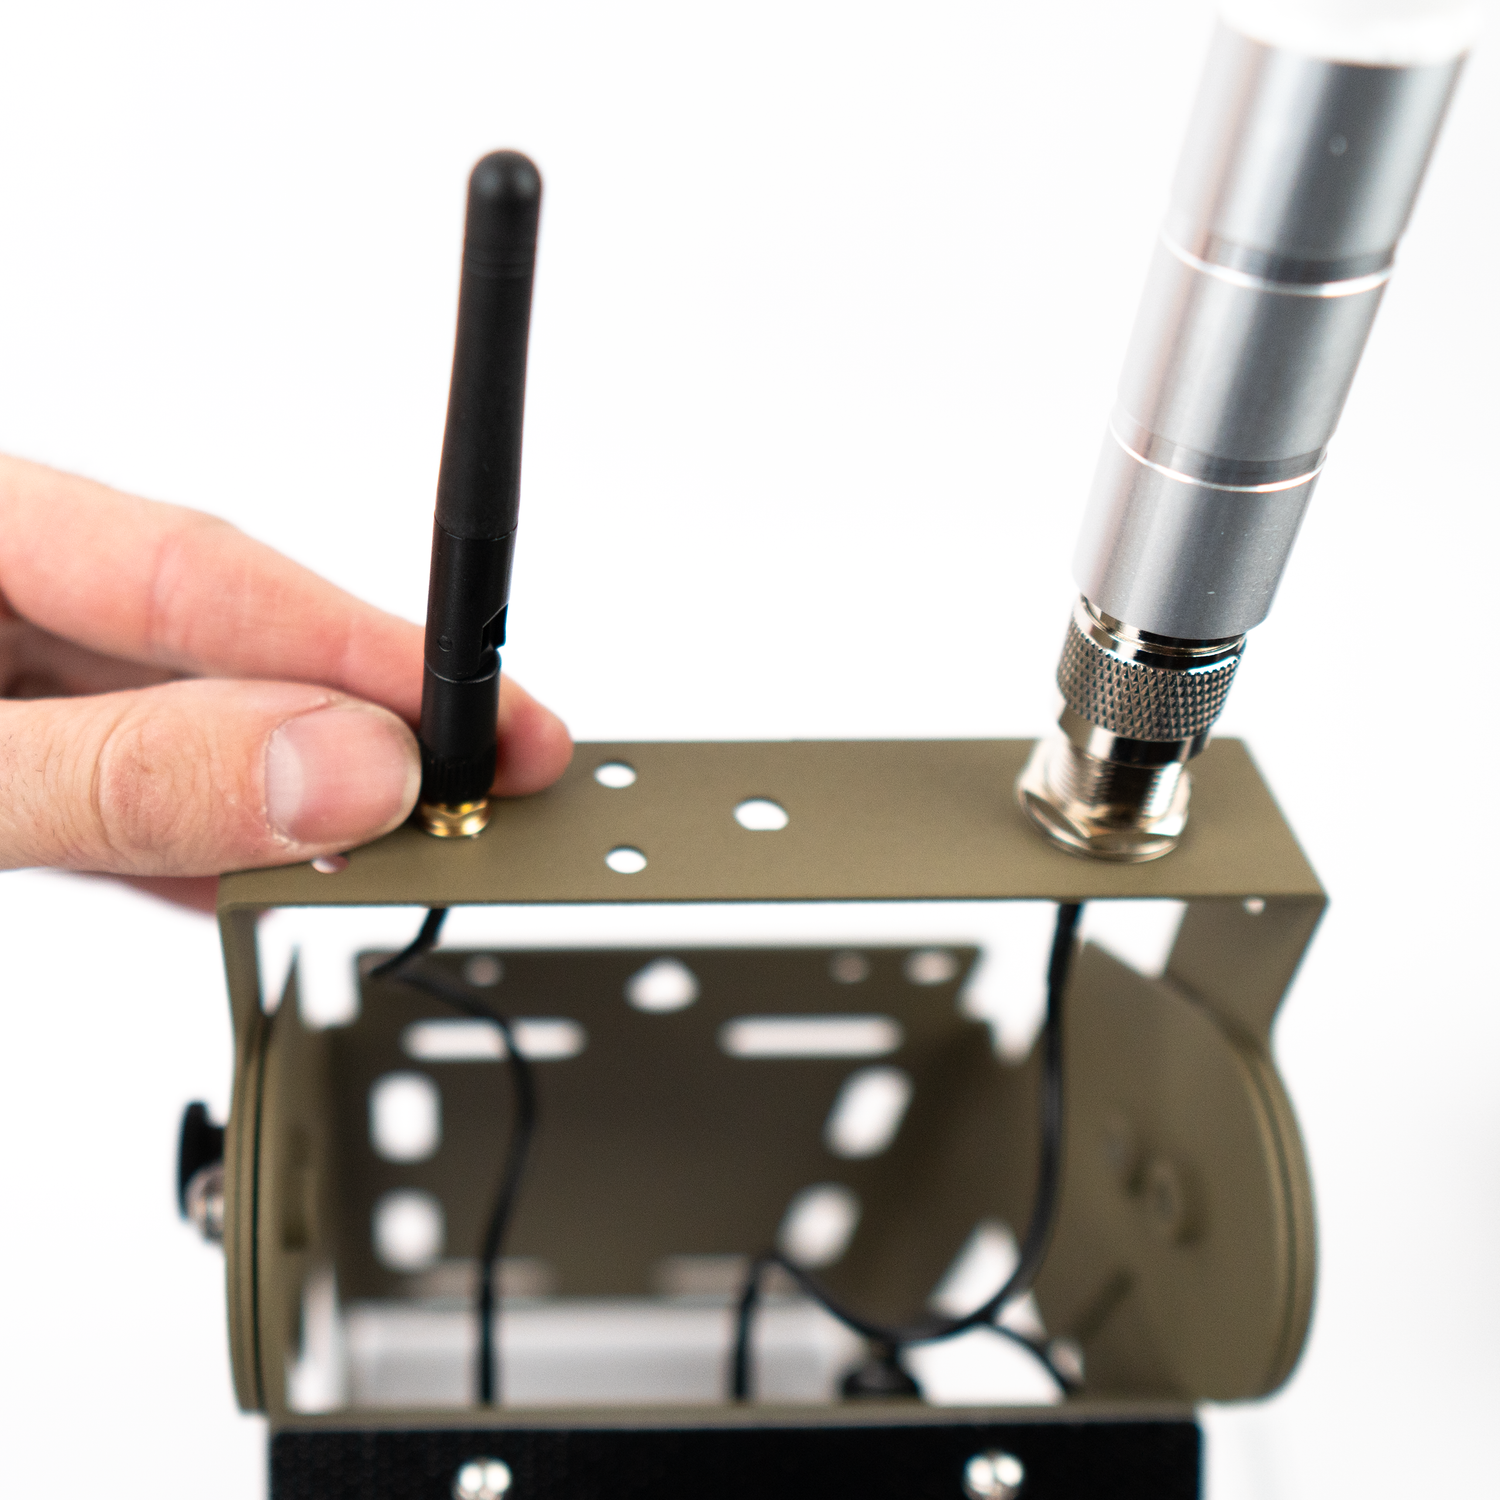
N-Type Antenna

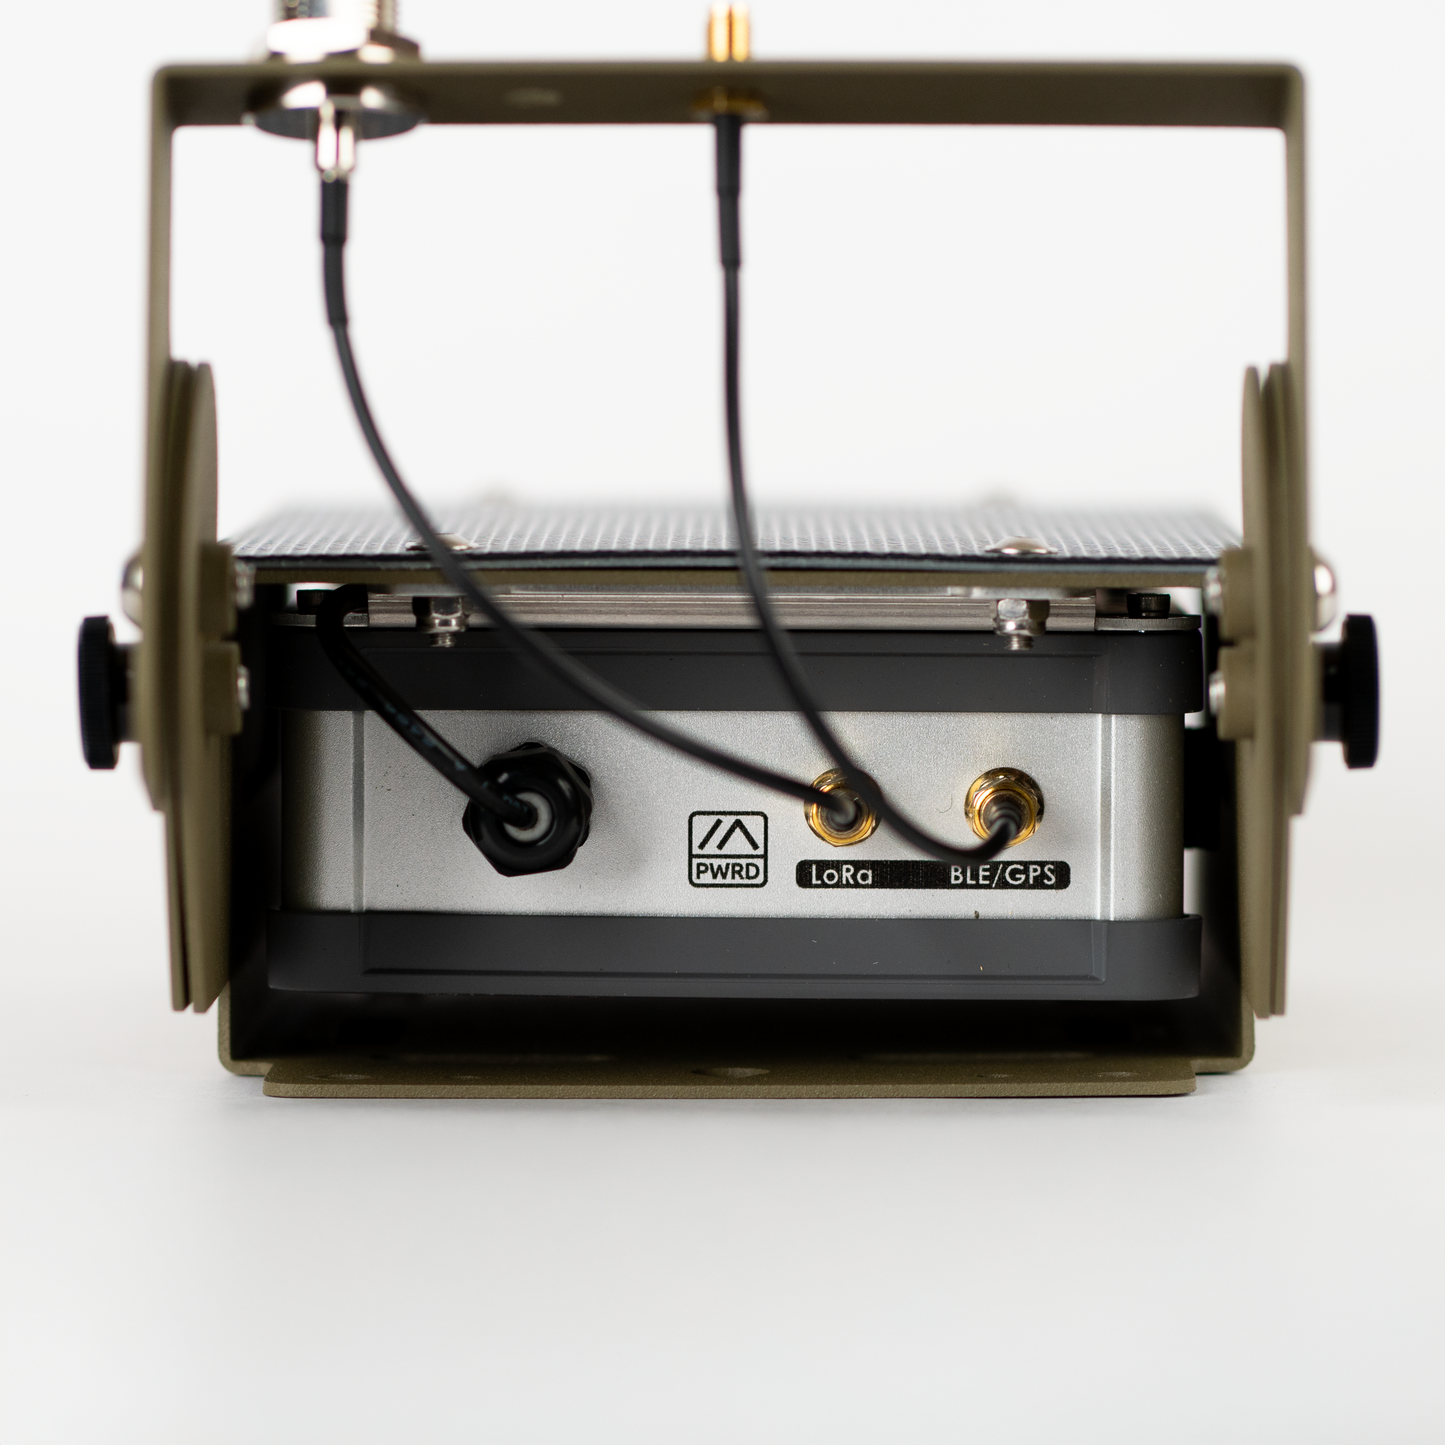
If you purchased the 12" 3dBi antenna or the 7" ALFA antenna, install your N-Type cable in this position on the antenna rail. Use the included washers and nut to secure it in place.
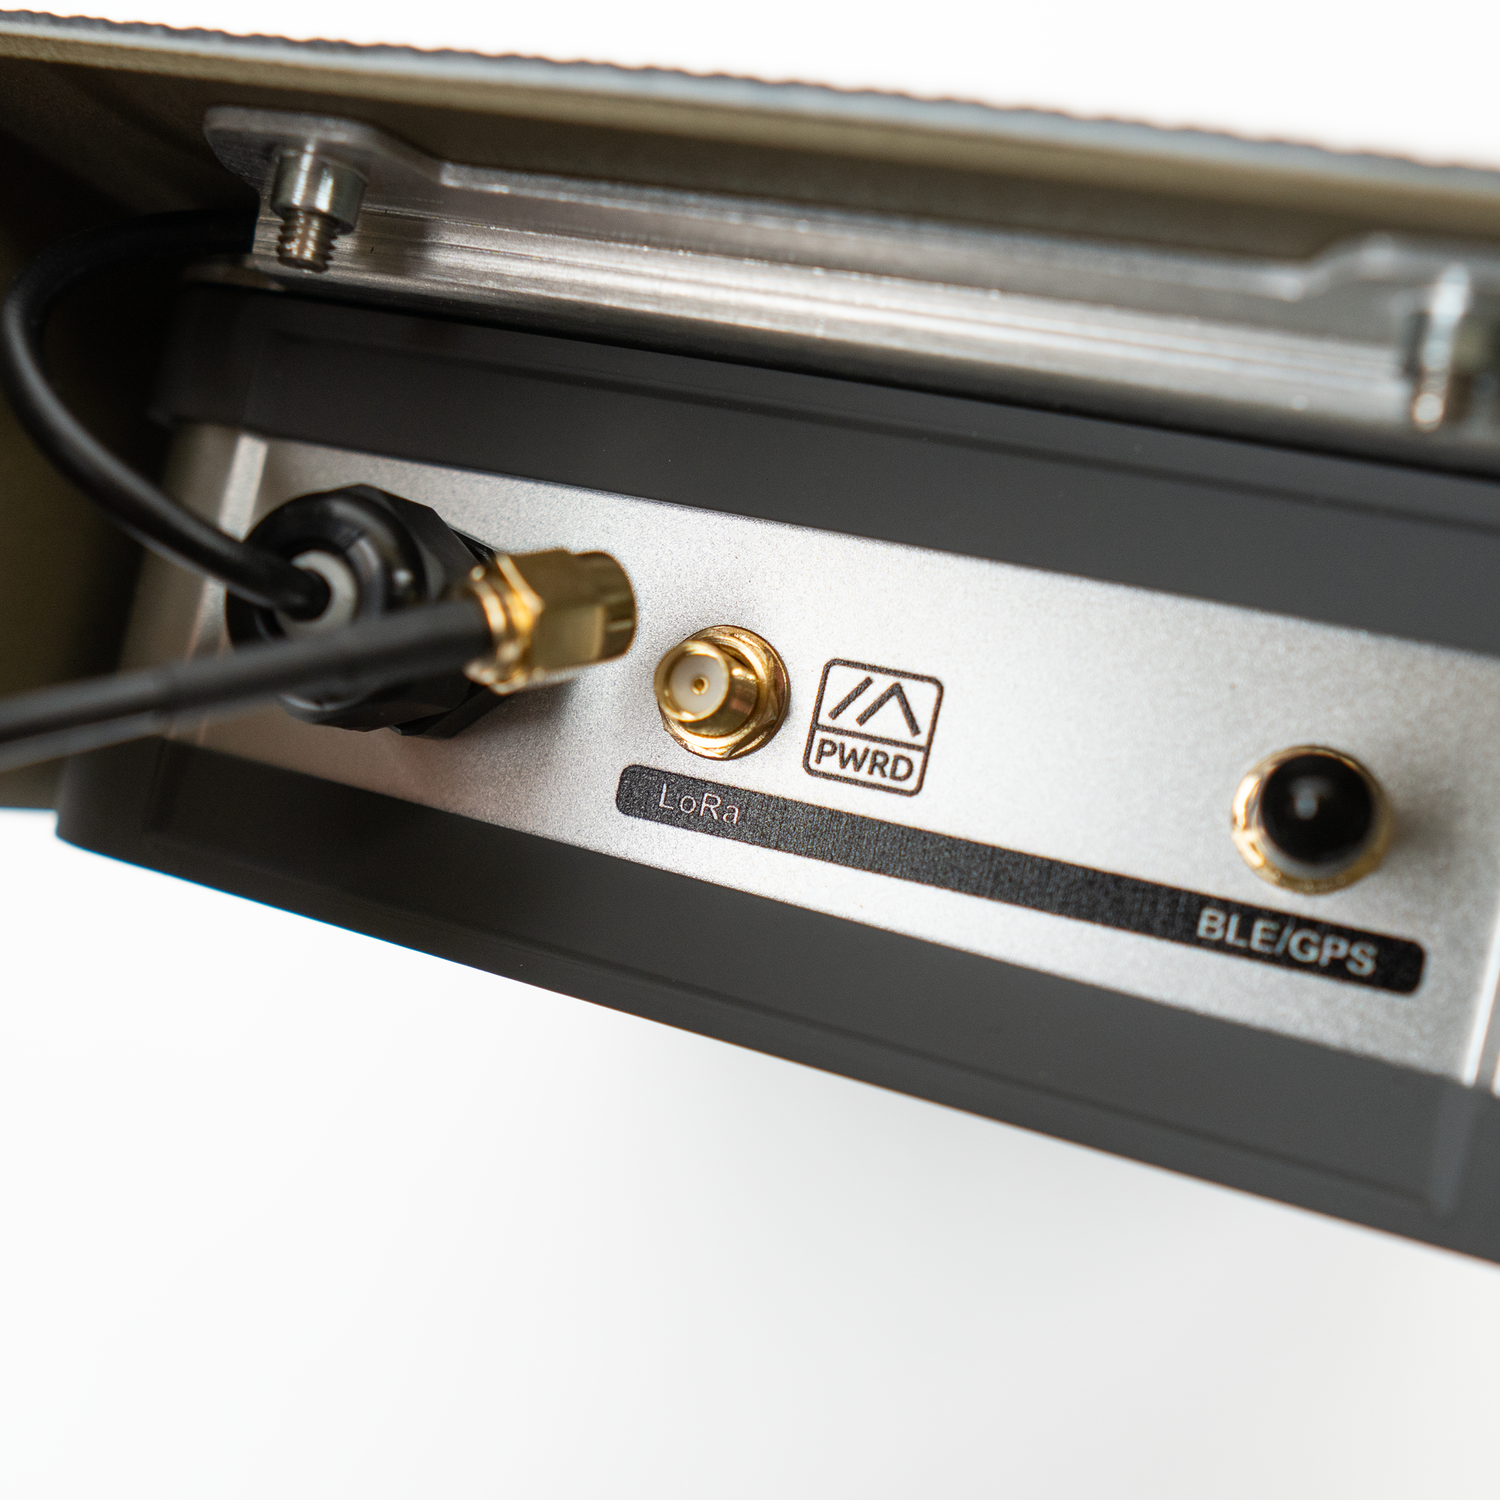
SMA Connector

Connect the other end of the antenna cable to the corresponding LoRa SMA jack on the enclosure.

The BLE/GPS jack is used for a BLE antenna if you chose an external BLE antenna with your purchase. If you chose an internal BLE antenna, the SMA cable will still be installed on the enclosure, it just won't be connected to anything internally. You can use it for any future upgrade or accessory.

LoRa Antenna

Install your LoRa antenna onto the N-Type connector. Please note that you need to put a little bit of downward pressure before the threads will engage.

BLE Antenna

If you purchased your Beacon with an external antenna, you'll need to connect the SMA cable to the enclosure, and mount the other side of the cable to one of the SMA holes on the antenna rail. (If you chose an internal Bluetooth antenna, you can skip this step. Your antenna is preinstalled inside the enclosure.

  • Latest Firmware

    Your Beacon will arrive with the latest stable version of Meshtastic firmware installed, immediately prior to shipping it to you. If you'd like to flash a different version, you can do it at https://flasher.meshtastic.org/

  • Custom Channel

    Your Beacon will be configured with a unique, custom private encrypted channel in the primary channel position, and will have precise GPS positioning enabled. All radios in your order will share this channel.

    The public channel will be moved to a secondary channel position for public communication.

  • Modules

    If you selected modules with your Beacon, they will come preinstalled and enabled in the Beacon settings.

Enabling Radio

Once you've connected the antennas, you'll need to connect to the radio with your cell phone through the free Meshtastic app in order to enable the radio.

You can follow the instructions on the M1 getting started page. The Beacon and the M1 use the same RAK WisBlock 19007 radio, so the setup process is identical.