
Connect
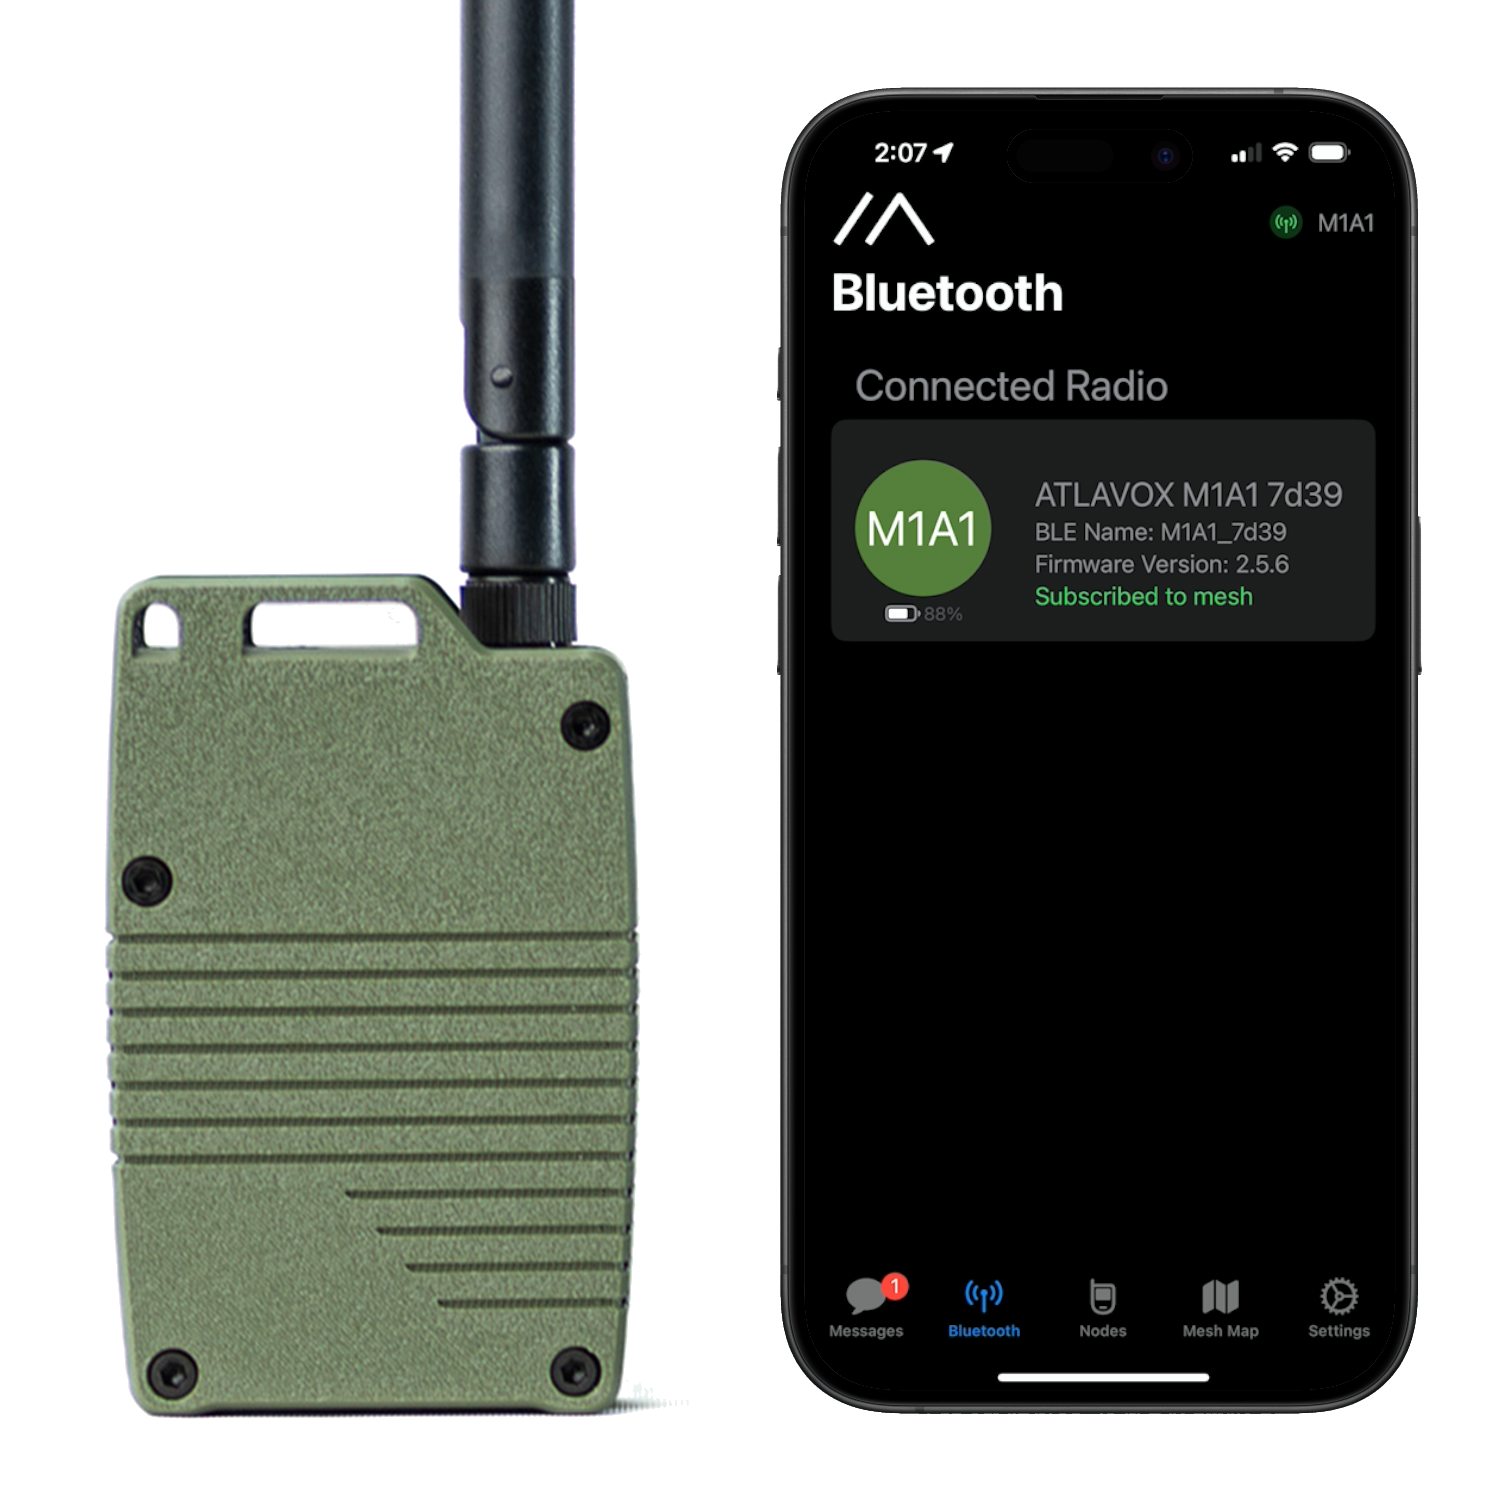
- Pair: Open the Meshtastic app on your phone. On the Bluetooth screen, you should see your radio appear. Tap on it. It'll ask for the Bluetooth Code "123456". (You can change your Bluetooth code later.)
- LoRa Region: Once you connect to your radio, you'll need to set the LoRa Region. (For Example; USA)
*If you're already connected to another radio, you might need to go into the Bluetooth settings on your phone and "forget" the device you are currently connected to, before you can connect to your new radio. You can only connect to one radio at a time.

Connect
- Open the Meshtastic app on your phone.
- Go to the Connection tab and find your radio on the Available Devices list. (Make sure your radio is on and tap Scan if you don't see it.)
- When prompted for a PIN, use 123456. (You can change this PIN later.)
- Tap Set your region to enable radio transmission. (For example, USA)
Communicate
Public Channel
Communicate on Public Channel
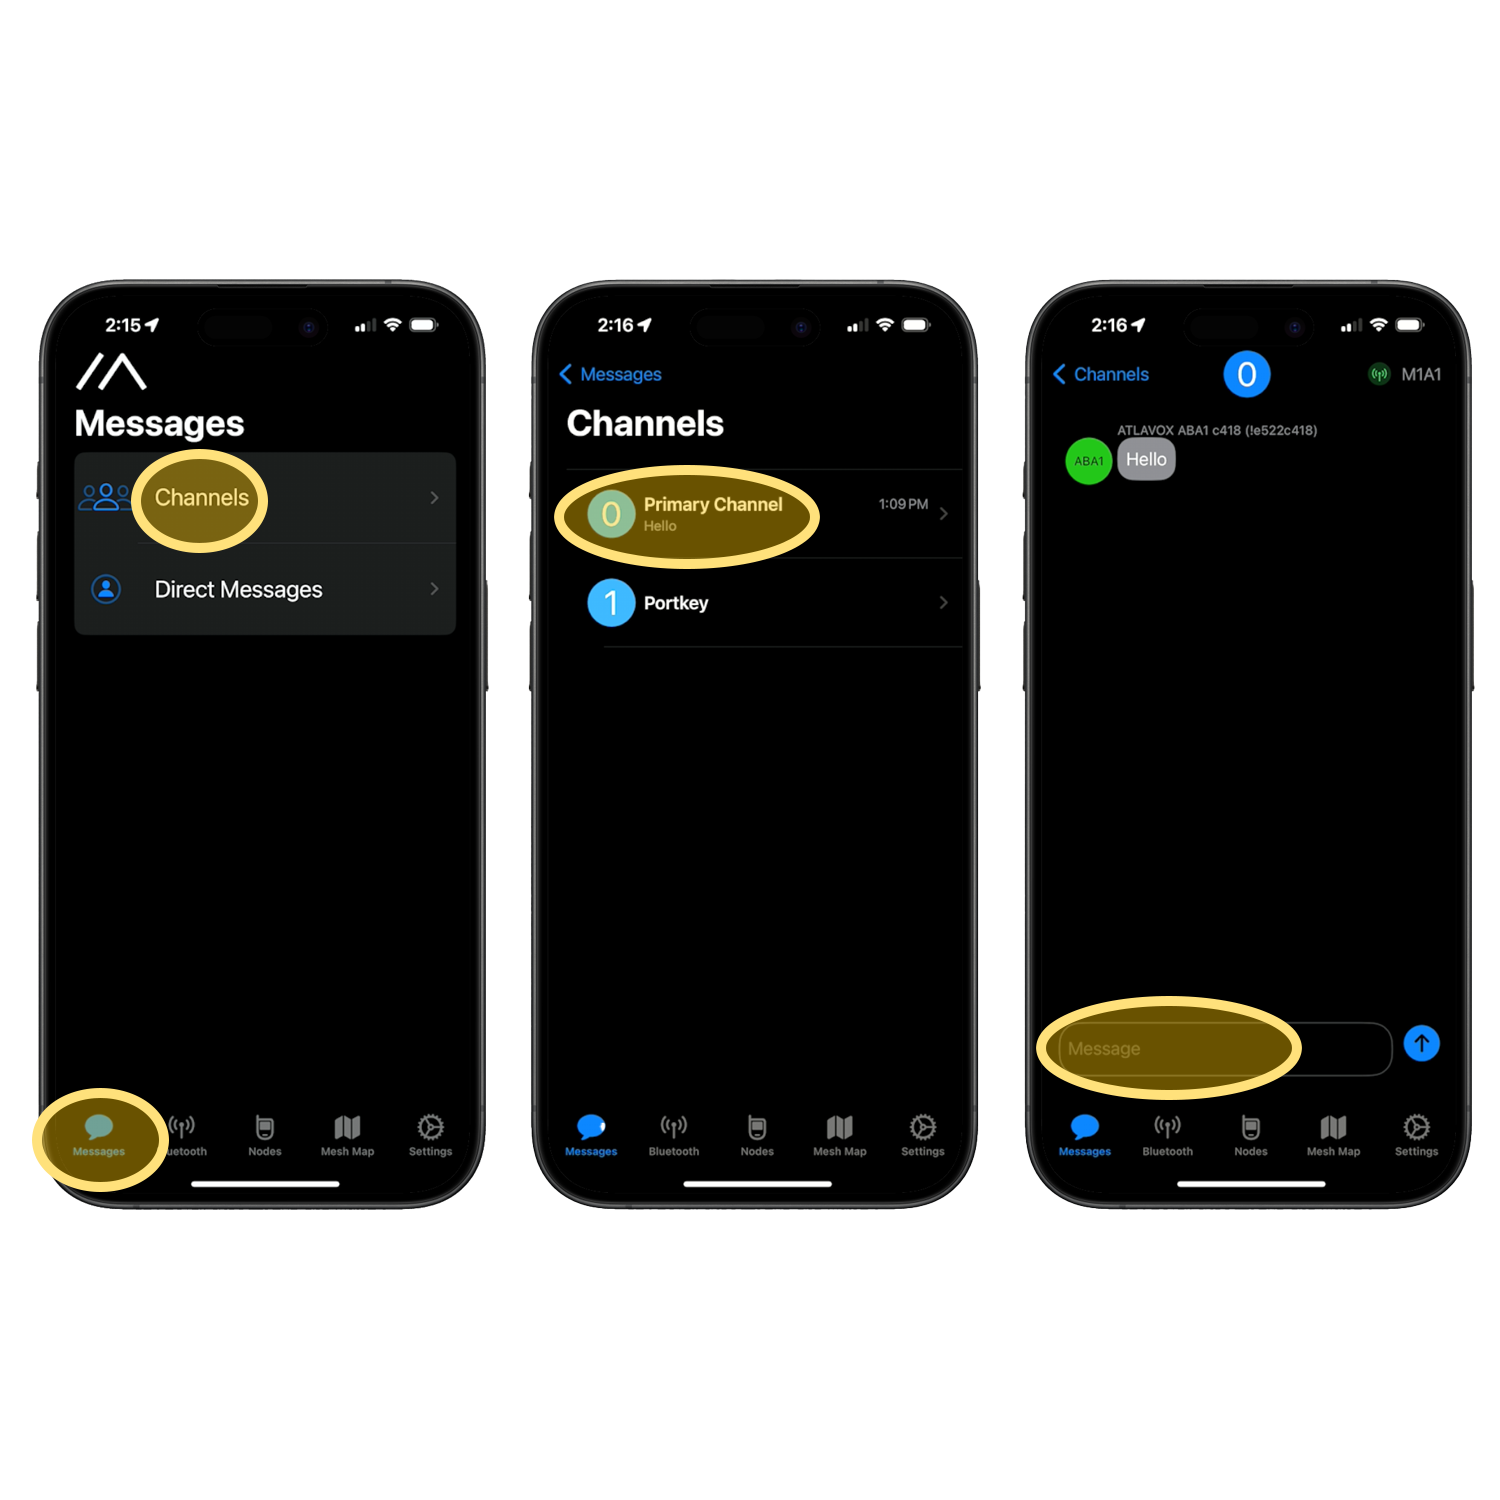
- In the Meshtastic app, tap on Messages > Channels. By default, the public channel is in slot 0. NOTE: If you purchased a preconfigured radio from Atlavox, you may notice a channel named "ALPHA" in slot 0, and the public channel is configured in slot 1. To communicate publicly, use the channel in slot 1.
- Type in a message and tap send, and your message will be transmitted to any local Meshtastic radios within range.
- As long as your phone is connected to your radio, you will see messages from others sent to the public channel if they're in range.

Communicate on Public Channel
- In the Meshtastic app, tap on Messages > LongFast.
- Type a message and send it to your local public mesh.
- As long as your phone is connected to your radio, you will see messages from others sent to the public channel if they're in range.
Private Messaging
Sending a Private Message
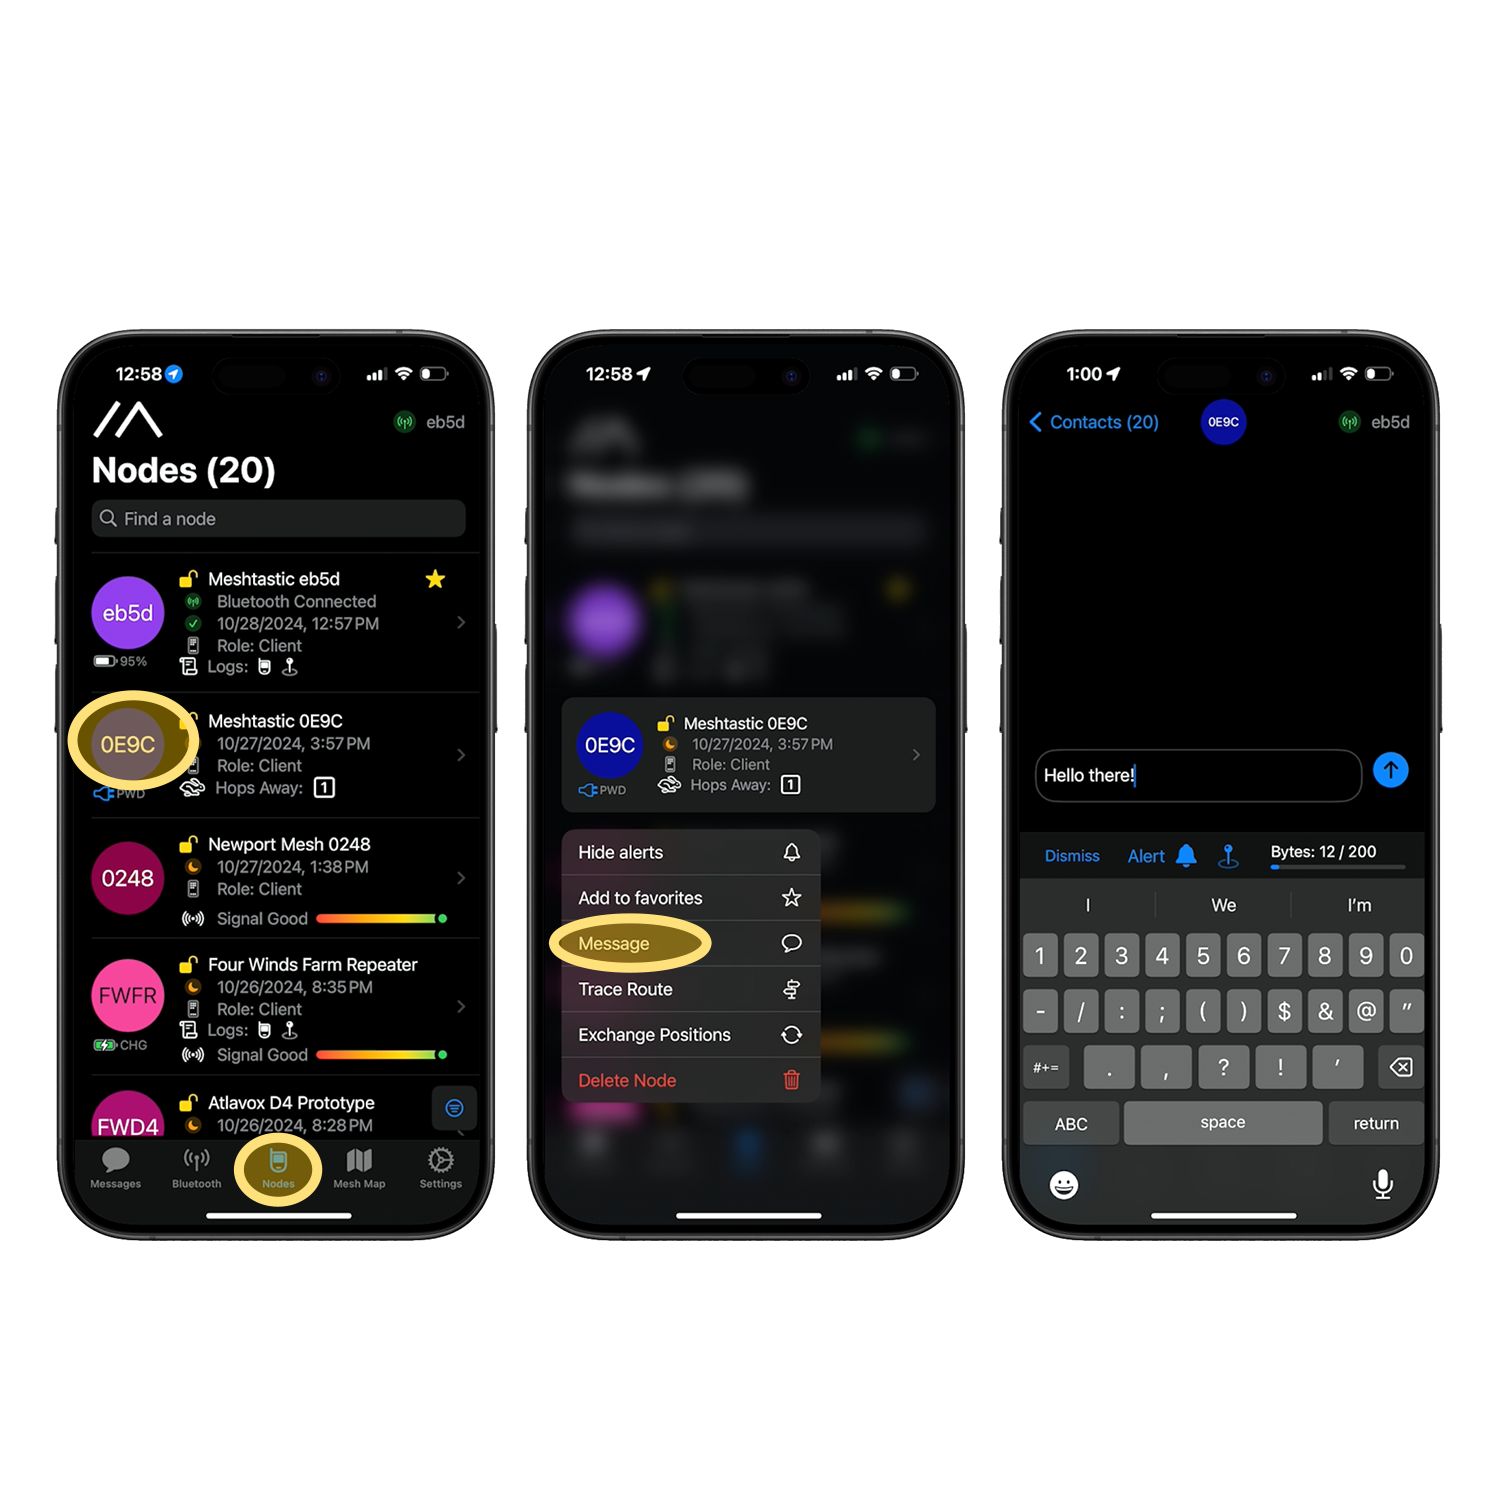
- To view a detailed list of nodes in-range, tap the Nodes button.
- To send a private message to a node, long-tap on a node > Message. (This brings you to Messages > Direct Messages > Node, which you can also access directly.)
- Type a message, tap send, and your message will hop to the destination node. As of firmware v2.5, private messages are encrypted by default. Only the destination node you are communicating with will be able to decrypt the message. Other node will still rebroadcast your communications so they reach their destination, but they won't be able to read the message without the encryption key.

Sending a Private Message
- Tap on the Nodes tab.
- In the list of nodes, tap on the short name of the node you'd like to message. (It's in a round, colored bubble)
- Tap Direct Message.
Private Channels
Create a Private Channel
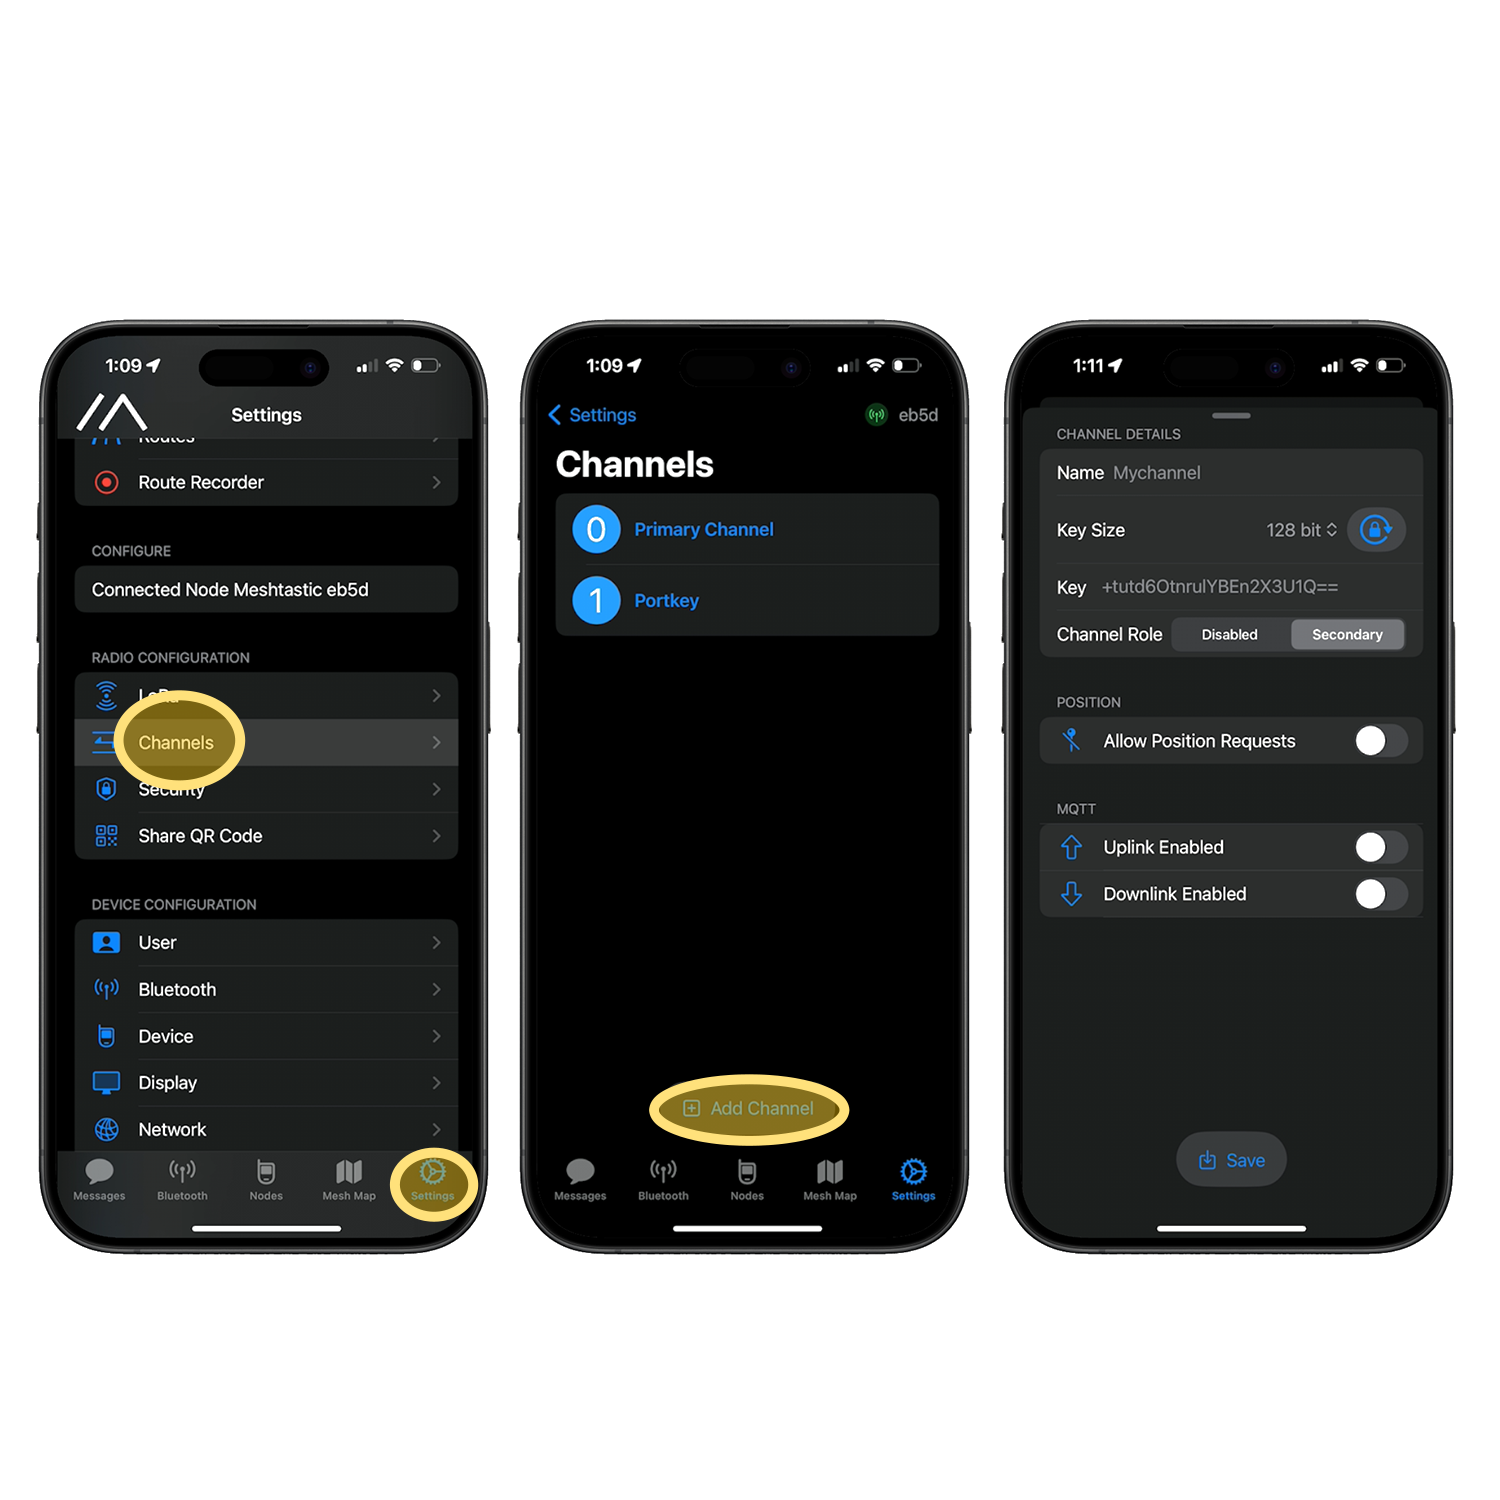
- In the Meshtastic app, go to Settings > Radio Configuration > Channels > Add Channel.
- Type in a unique name for your channel.
- Leave the default settings unless you want to change them.
- Tap Save.
Create a Private Channel
- In the Settings tab > Radio configuration > Channels, tap the + icon.
- Type in a unique name for your channel.
- Leave the default settings unless you want to change them. (Key will be generated automatically for you.)
- Tap Save.

Share Private Channel
Share a QR code with others you'd like to communicate with on your private channel. The QR code will enable automatic configuration of the channel.
- Go to Settings > Radio Configuration > Share QR Code.
- In the list of channels, uncheck all except for the new channel you'd like to share.
- Make sure the button under the channel list says Add Channels, not Replace Channels.
- Tap Share QR Code & Link to share it with whomever you'd like to communicate with on the channel.

Share Private Channel
Share a QR code with others you'd like to communicate with on your private channel. The QR code will configure the selected channels and keys automatically.
- On the Conversations tab, tap the QR Code icon.
- Toggle which channels you'd like to share
- Copy the URL and send to friends, or have them scan the QR code generated.
Location
Enable GPS Sharing
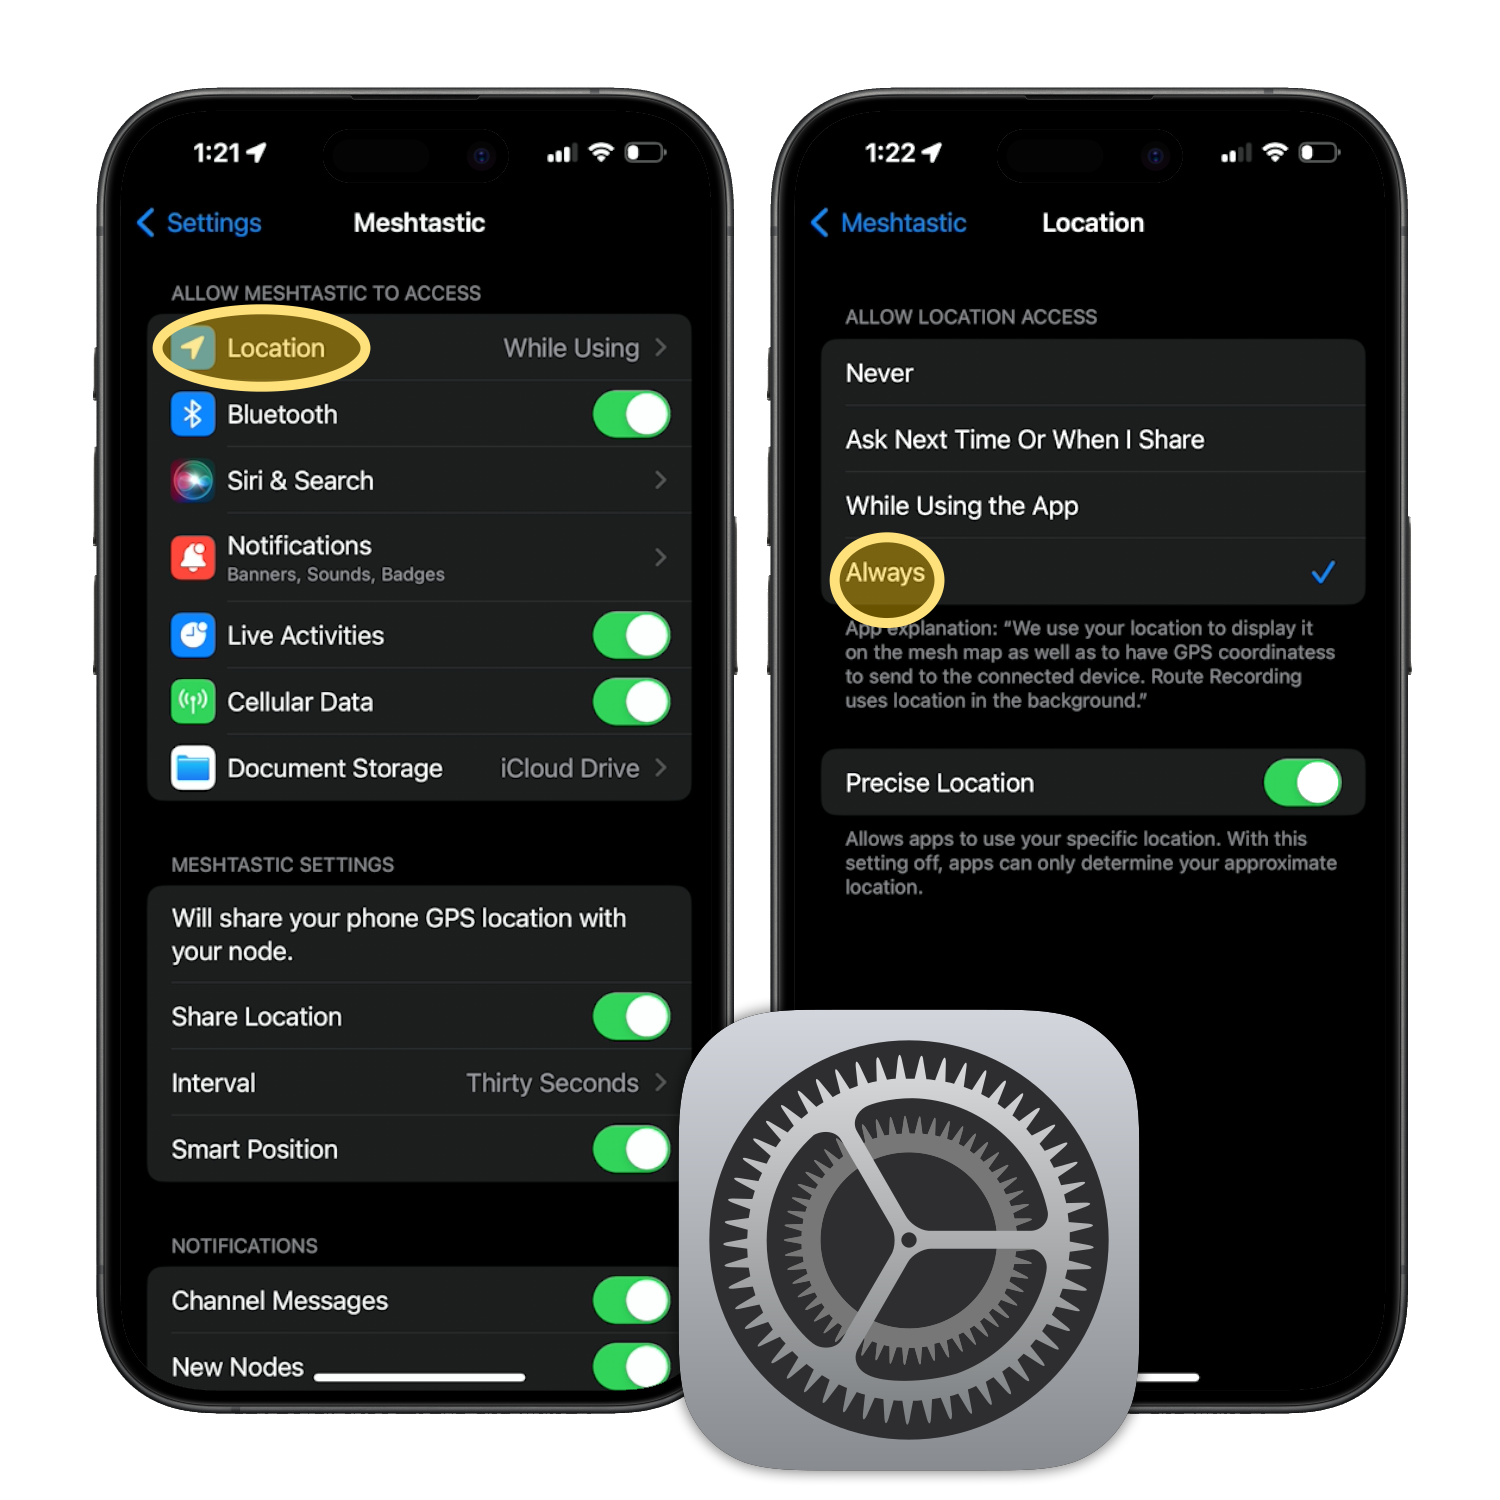
- Outside the Meshtastic app, open iPhone Settings.
- Scroll far down until you see the Meshtastic app, and tap on it.
- Tap Location > Always.

Enable GPS Sharing
- Long-press on the Meshtastic app icon > App Info.
- Under App settings, tap Permissions.
- Enable Location sharing.
- Open the Meshtastic app, tap the Gear icon > App > enable Provide phone location to mesh.
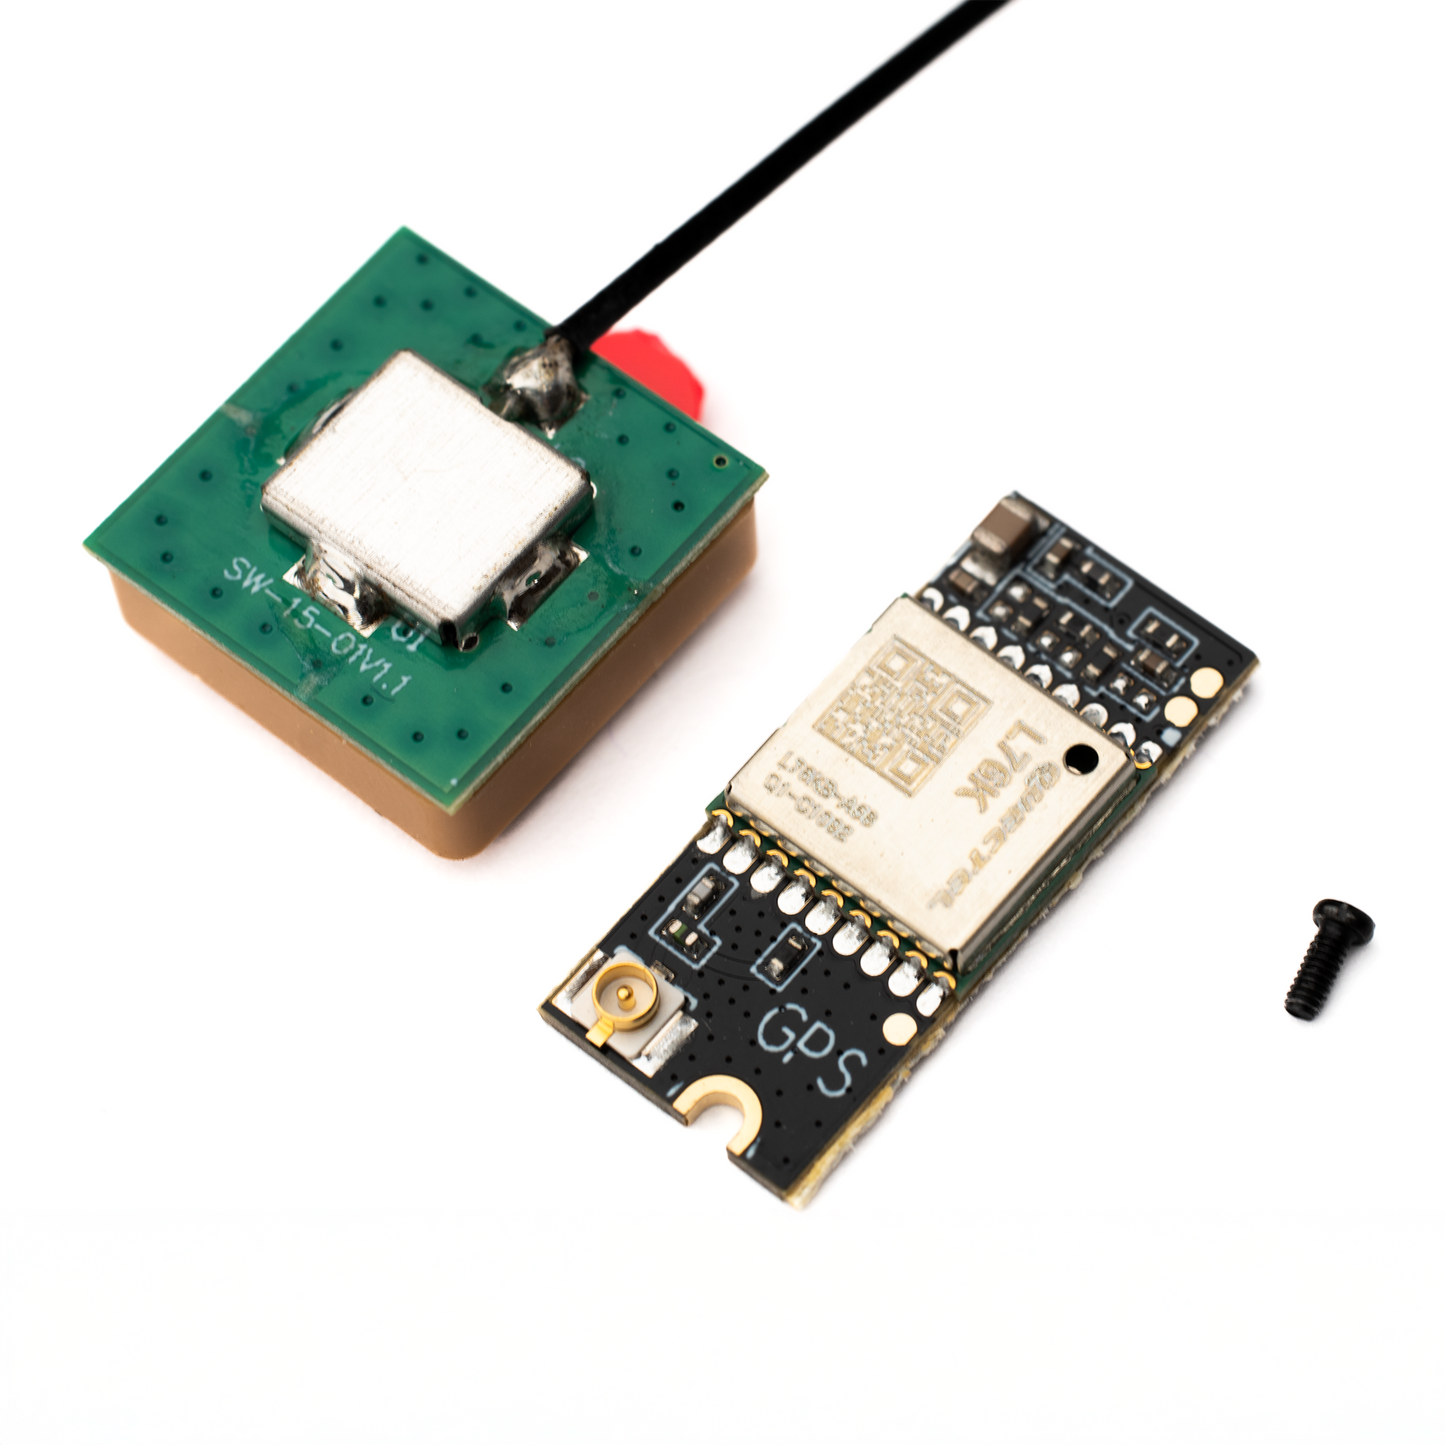
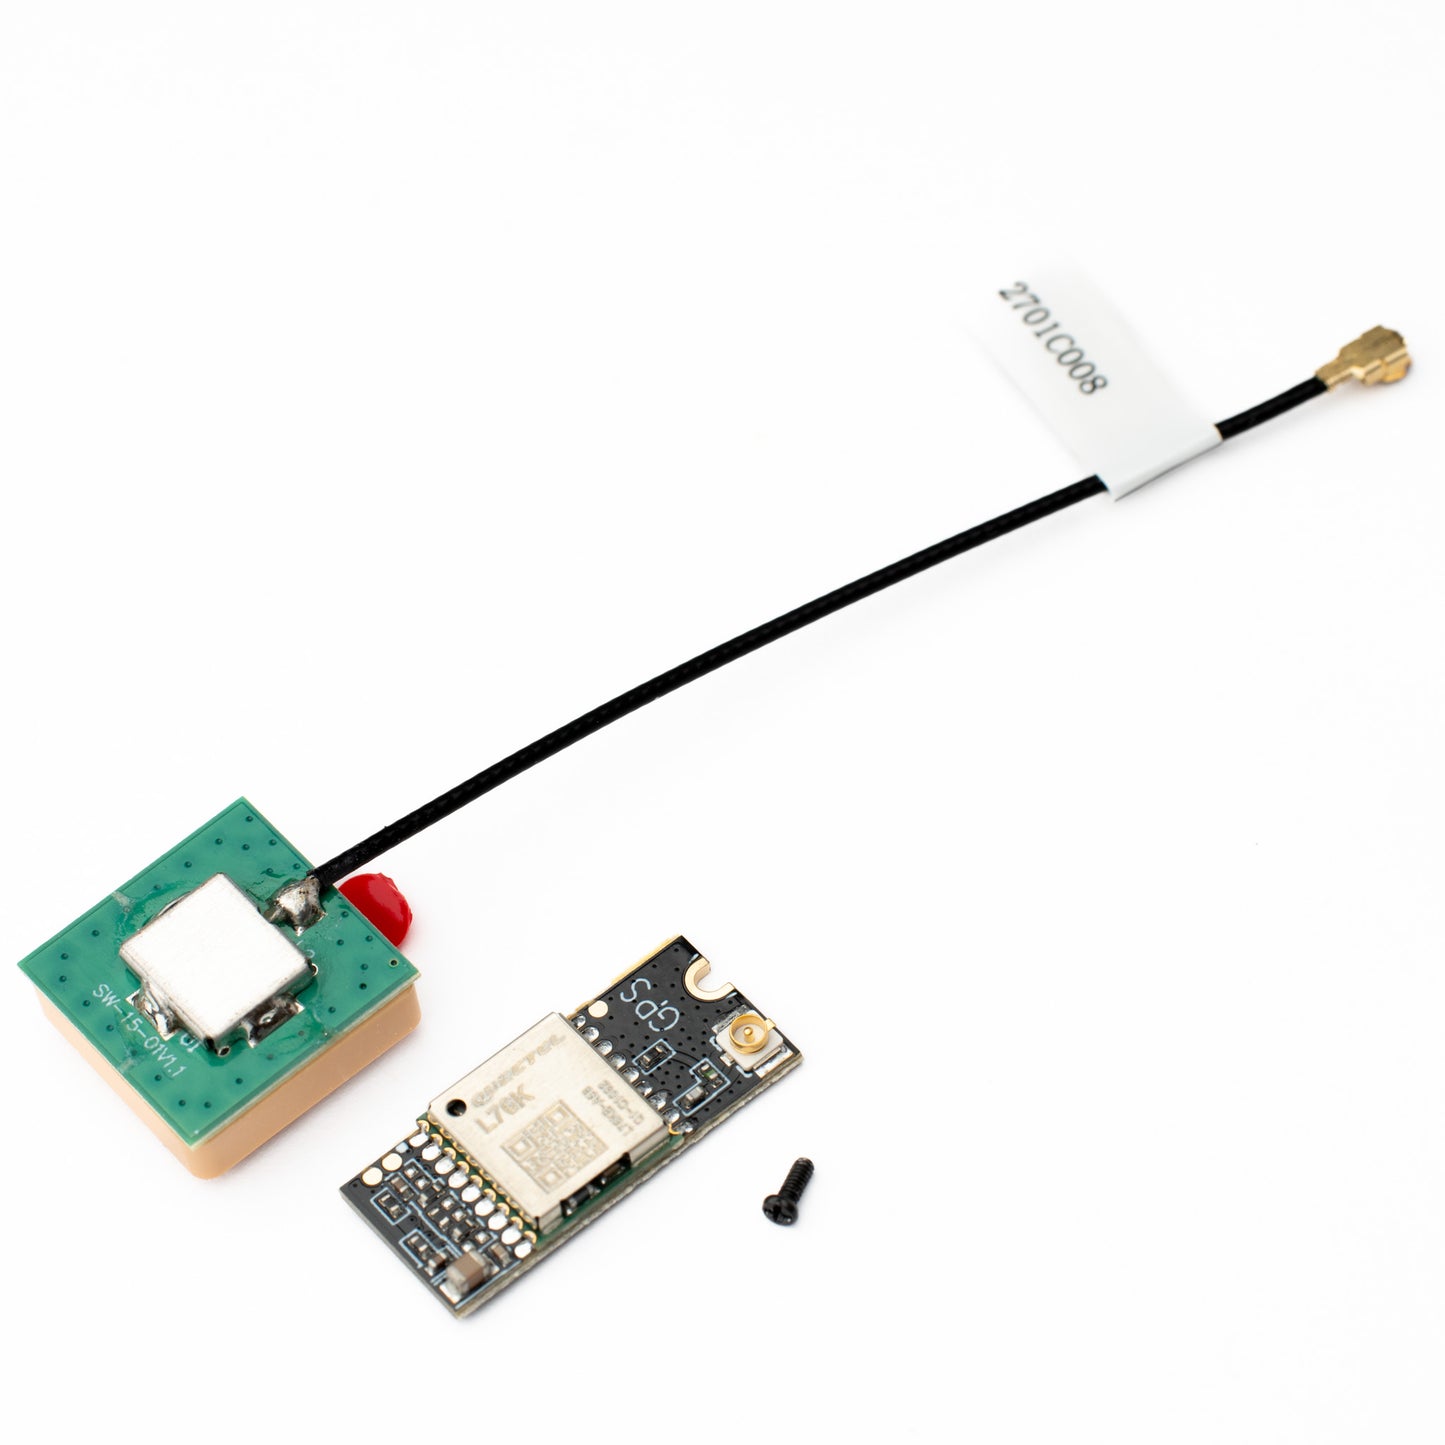
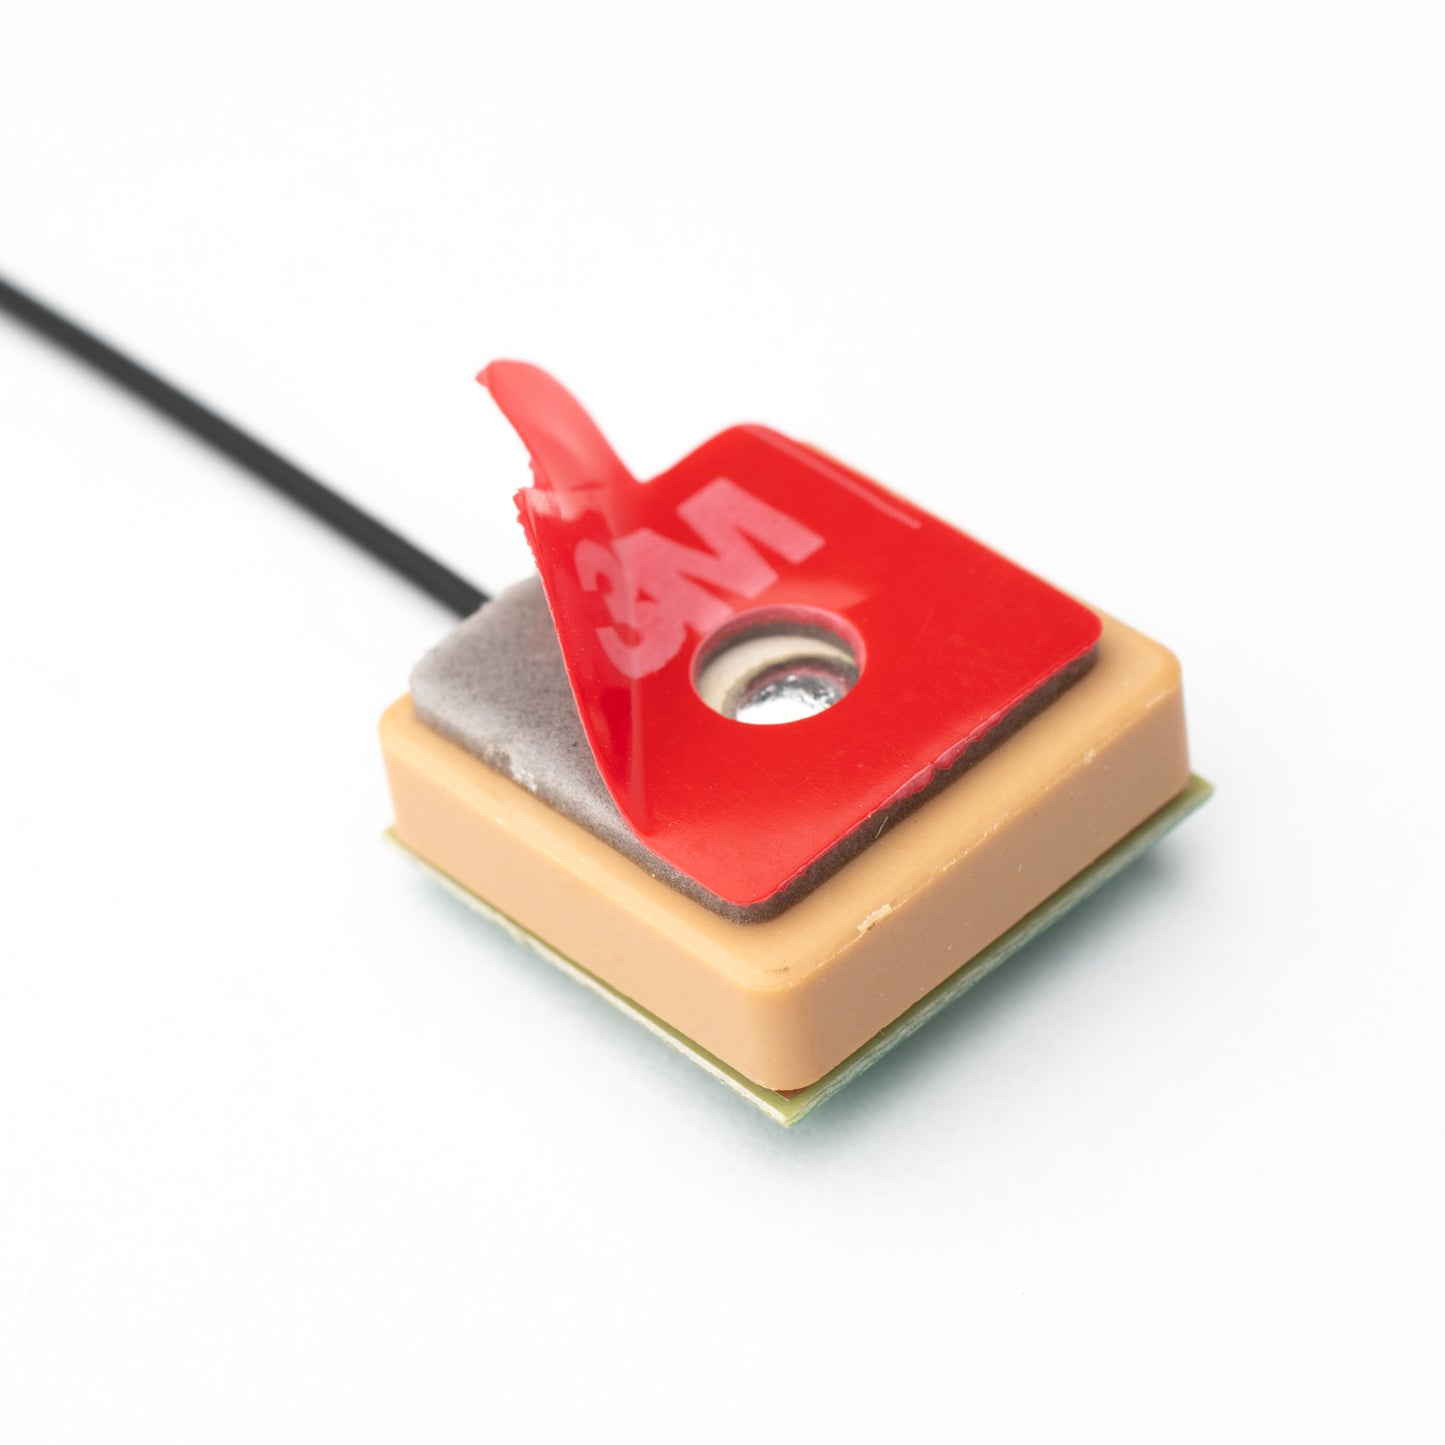
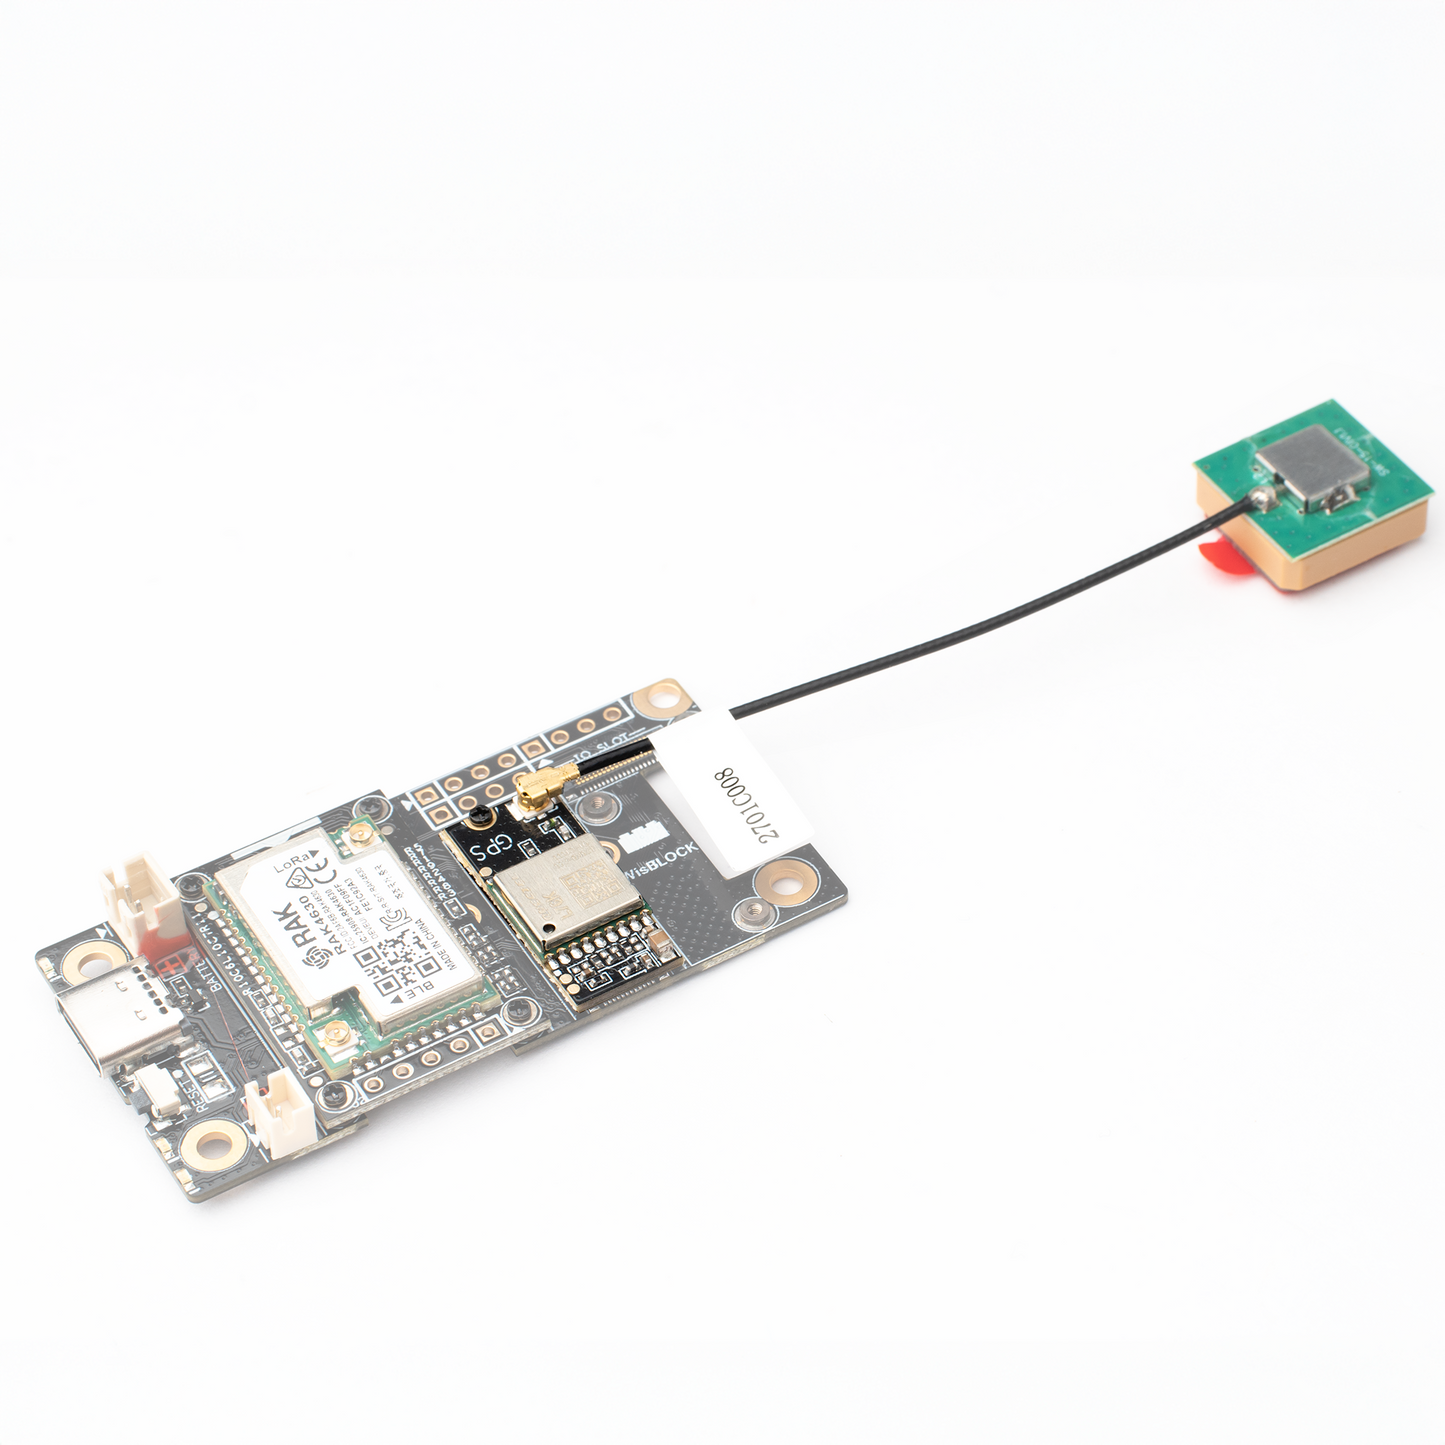
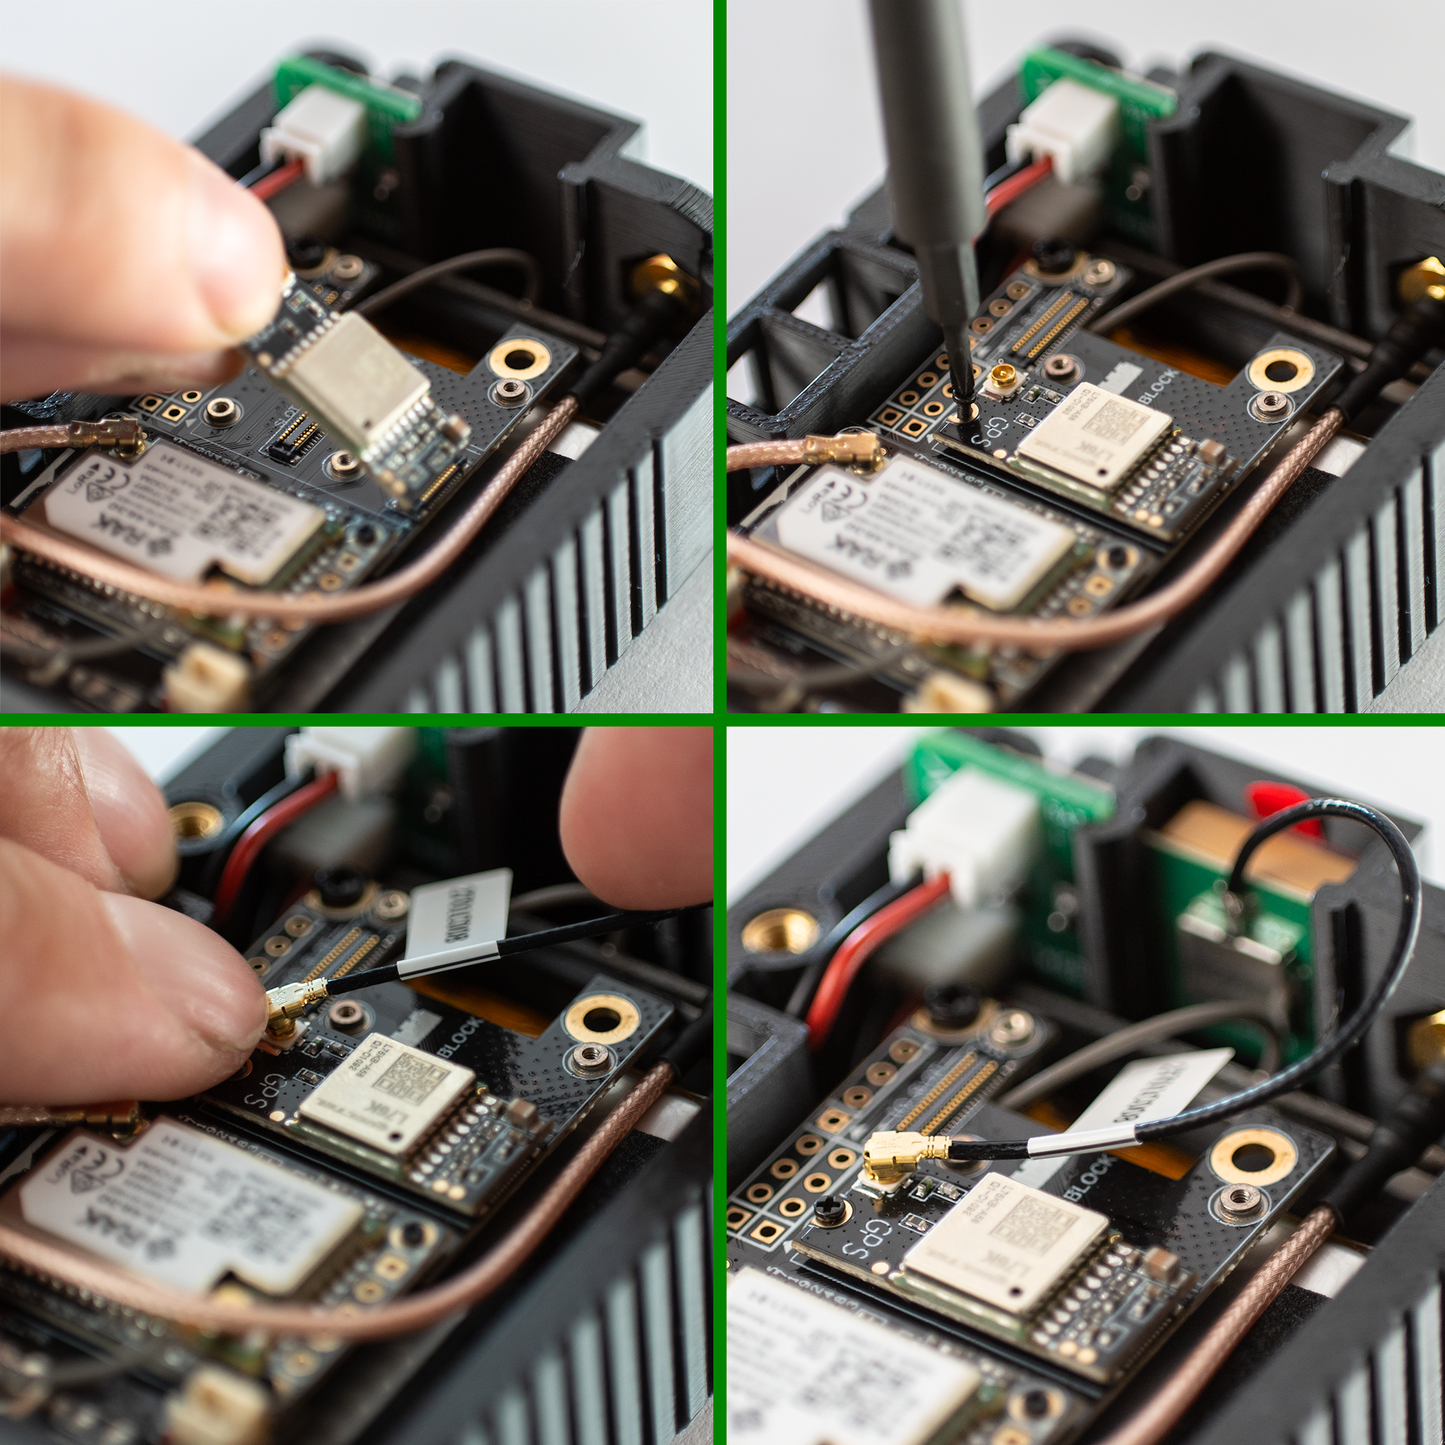
Dedicated GPS


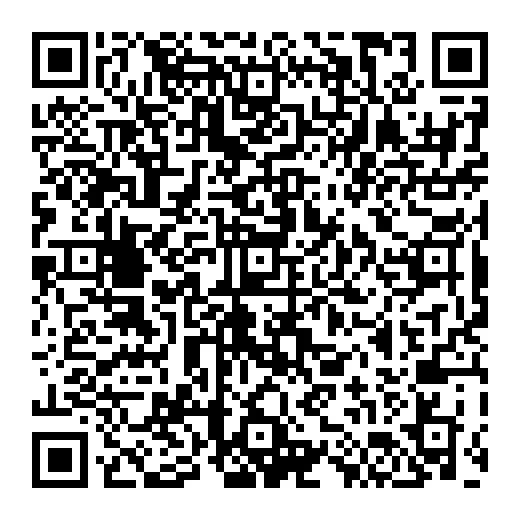
Auto Channel Config
If you'd like to quickly configure your US frequency radio to have a private Primary Channel with broadcast telemetry, and configure the public channel to a Secondary channel, scan the QR code for automatic configuration.
NOTE: Make sure you change the PSK for your private channel after scanning this code, otherwise anyone with this code will be able to decrypt .
For other frequencies/locations, click here.
- Choosing a selection results in a full page refresh.
- Opens in a new window.